
Hi everyone! Thanks so much for tuning in to part 3 of our fused glass tutorial series: Suspended in Amber.
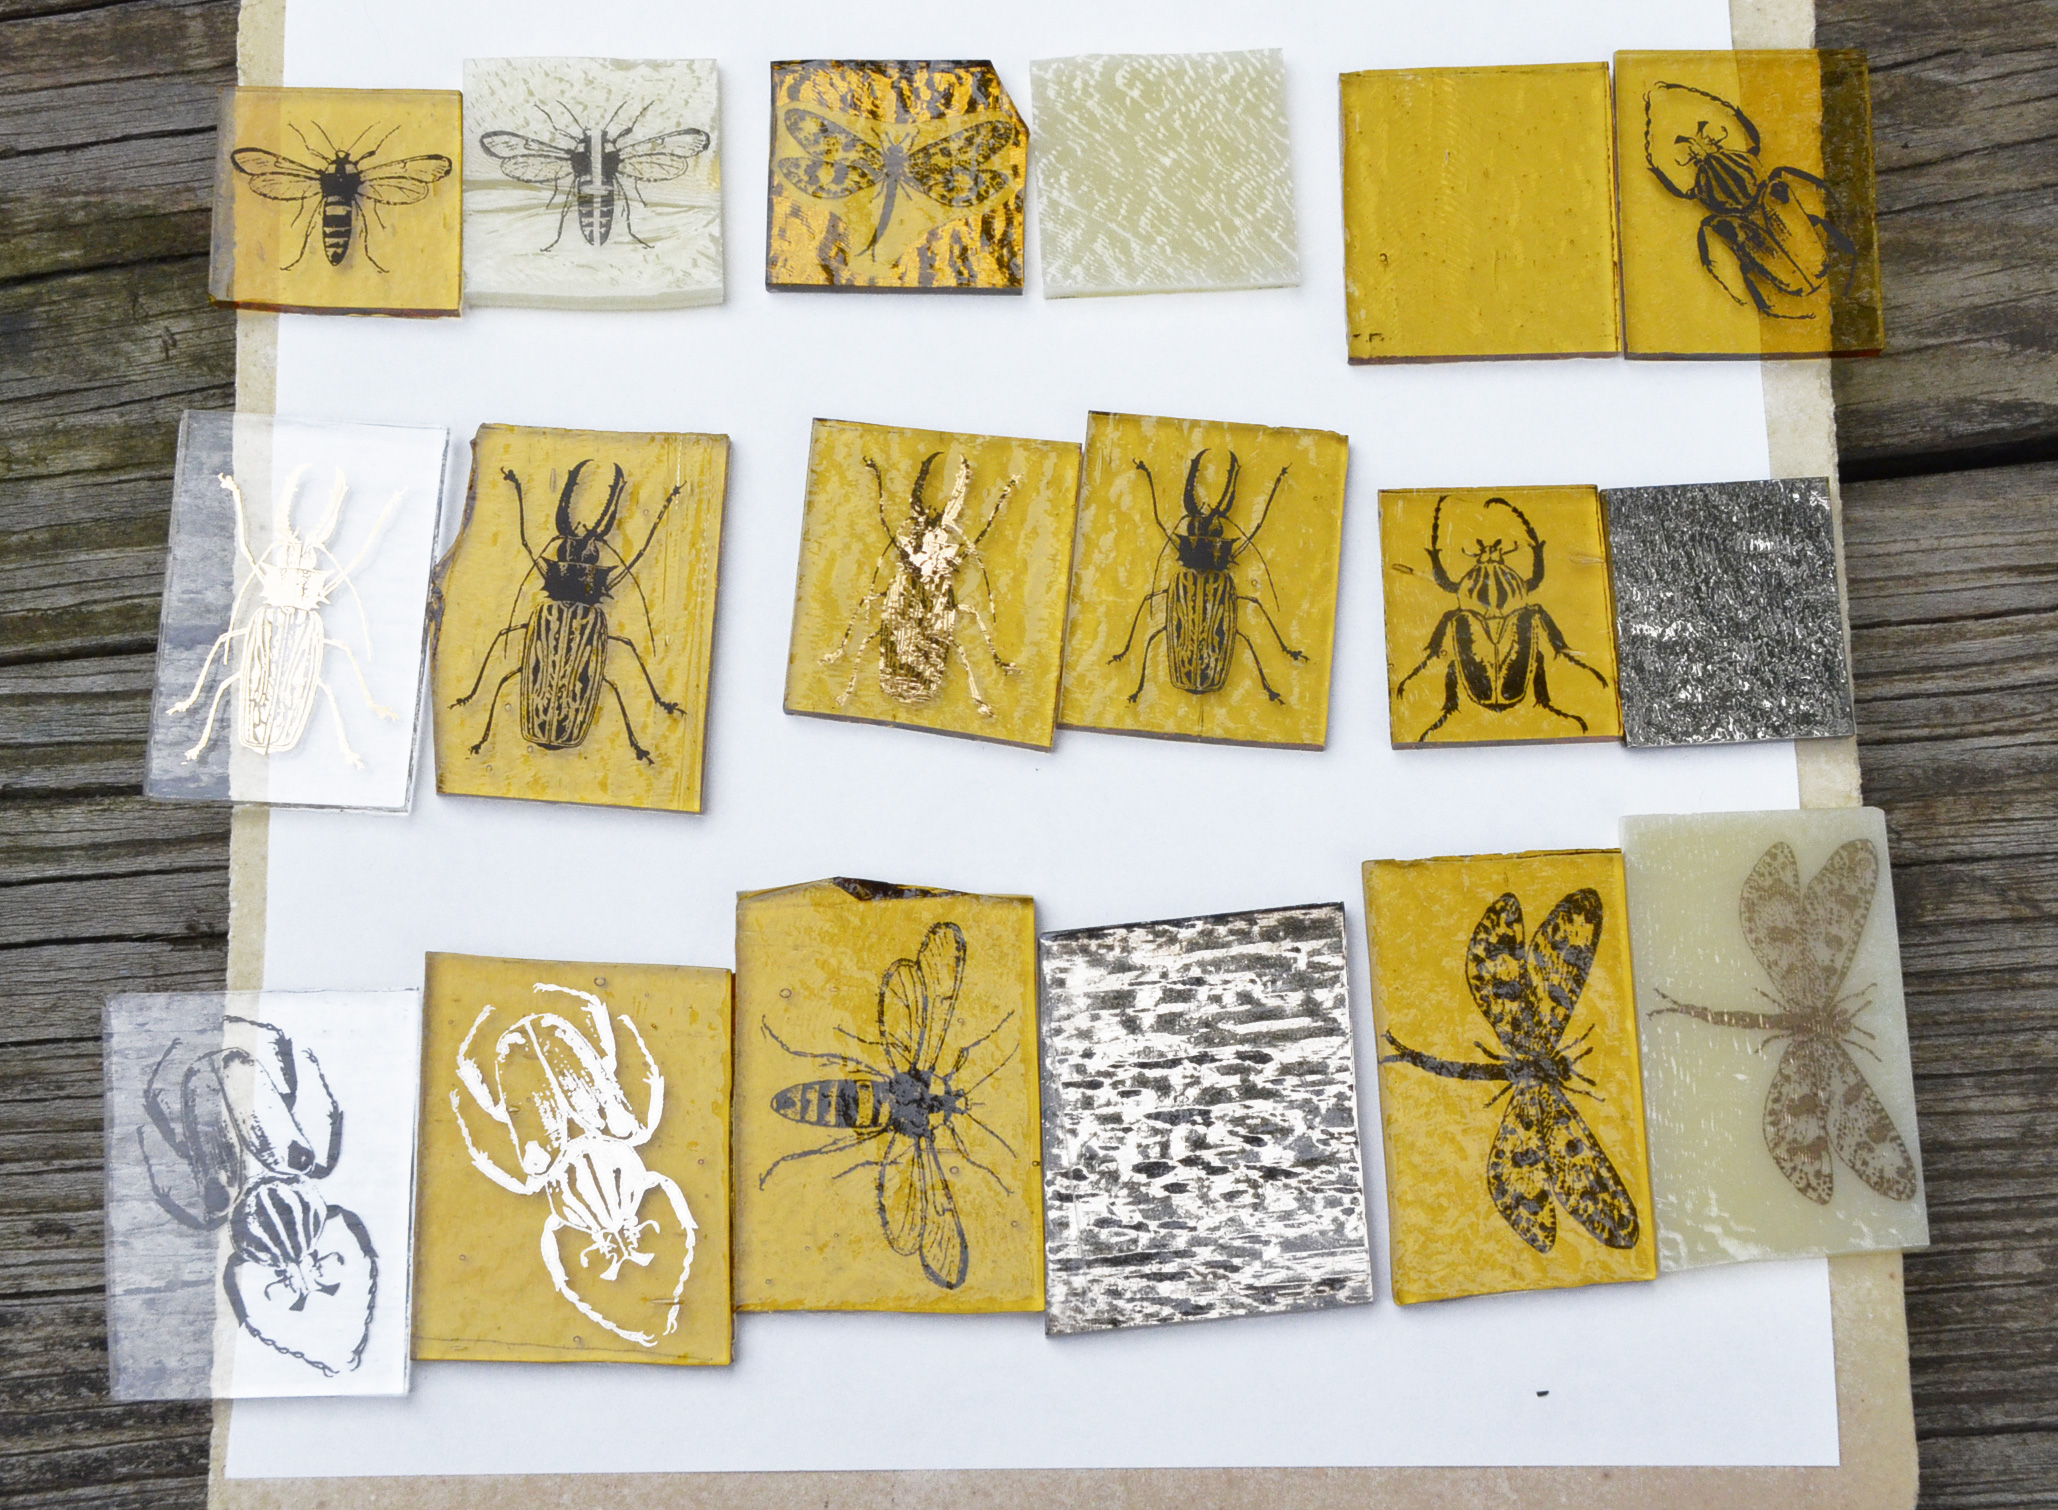
In this series we worked on an idea we had been chewing on for some time: Using different colored insect decals and different colored glass (kindly provided by our friends at Bullseye Glass New York) to make glass pieces that looked like insects in amber.
In total, we used 9 different glass and decal combinations to create an array of interesting and unique effects. In Part 1 of this series readers will find an outline of the techniques we used as well as firing instructions. In Part 2 of Suspended in Amber we discussed the different glass and decal combinations we used in tests 1-5.
Now in the third and final installment of our series we will explain the glass and decal combinations we used in tests 6-9. So without further ado, let's get started.
Amber with black decal on the left, clear glass with platinum full coverage decal on the right.
TEST 6.
In test 6 we used solid color platinum decal to create a reflective, mirror effect.
In this case we pre-fired the black insect decal on amber glass. We cut-to-shape a piece of platinum decal and pre-fired on clear glass.
Check out the way that the decal on top reflects back from the platinum sandwiched between the layers!
For the final fuse firing, the platinum decal on the clear glass was sandwiched between the two layers of glass. The black decal on the amber glass was the top-most layer of the stack. I guess you could call test 6 The Platinum Sandwich.
Test 6: The Platinum Sandwich was one of our favorites. Reflections, depth and even some well-placed bubbles (purely accidental) give this Insect in Amber a very interesting look. The way the platinum peeks out between the two glass layers is also a very nice feature.

Platinum decal on Amber and Black decal on Clear.
TEST 7.
Once again, we are inspired by the depth that can be created with glass. In this case we used the exact same decal in two different colors. The topmost piece of glass (amber color) was pre-fired with a platinum decal and the bottom piece of glass was pre-fired with a black decal on clear glass.
For the final fuse, we wanted to get the most possible depth, so we arranged the glass layers so that the black decal on the bottom-most clear glass was actually touching the kiln shelf. The top-most platinum decal on the amber glass was on the very top. No decal sandwiching was done in this test.
Test 7. Shiny platinum appears to cast a black shadow in this depth-of-play piece.

The black insect was pre-fired onto the amber glass and the platinum full coverage decal was pre-fired onto the clear glass.
TEST 8.
For test 8, we revisited platinum full coverage decal. In test 6 (previously in this post), we sandwiched the platinum between the glass layers. For test 8, we decided to fire the platinum on the very bottom-most layer of the glass with the platinum itself actually touching the kiln shelf.

Test 8 on the left. The platinum seems to have burned away a bit during the final fuse firing, whereas the platinum in test 6 on the right retains its full character and color. Also note the interesting image distortion in the black insect decal on the left, which was sandwiched between the 2 glass layers . The insect on the right sat atop the glass during final fuse and thus exhibits no distortion.

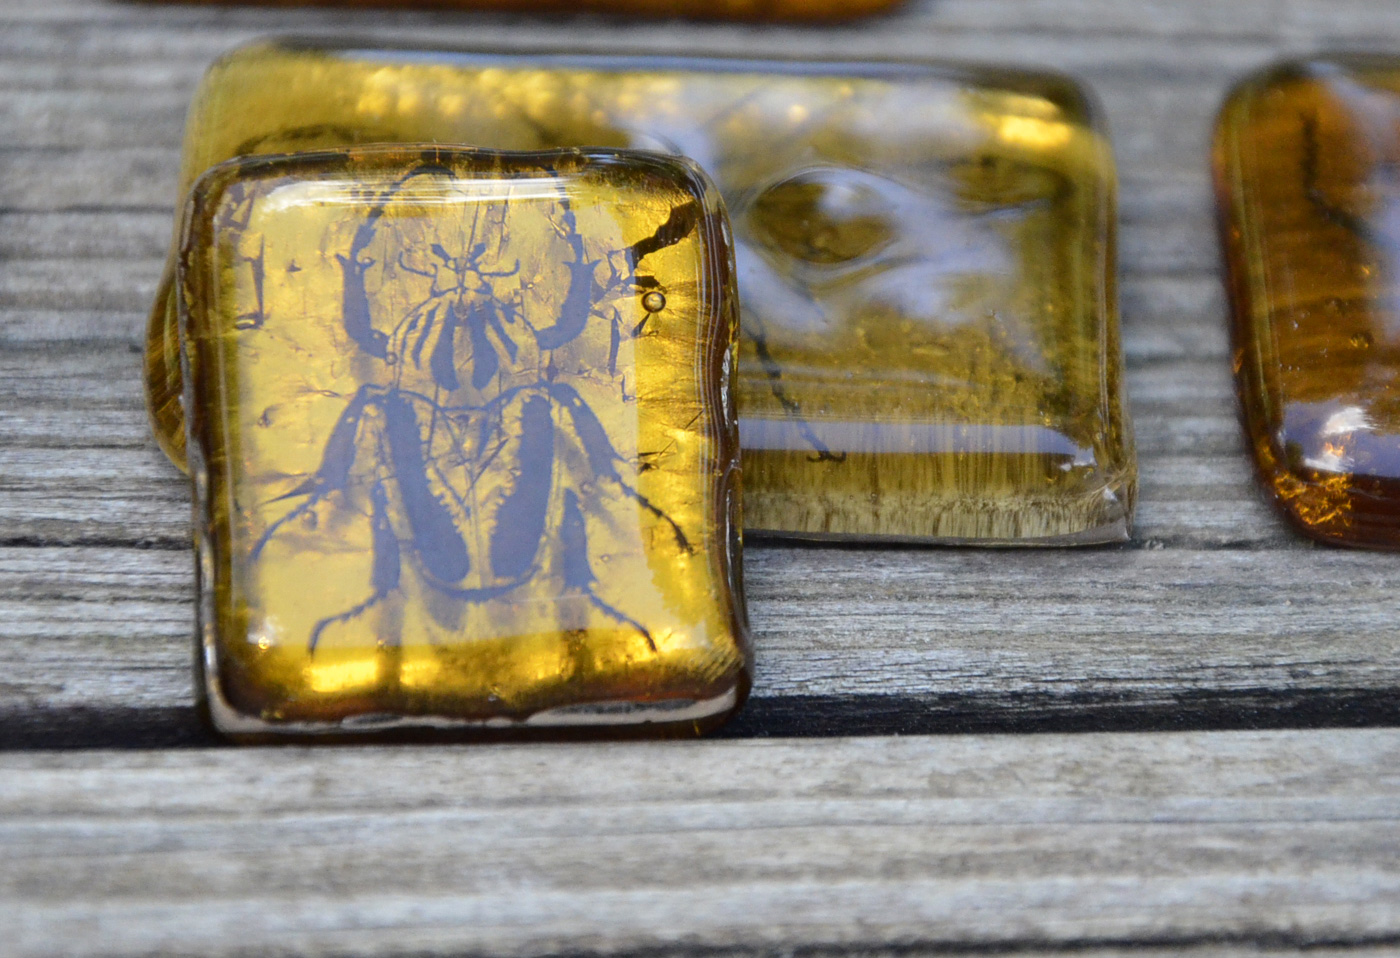
Black decal on amber glass and copper decal on french vanilla after the pre-firing.
TEST 9.
For this test we pre-fired a black decal on amber glass and a copper decal on french vanilla, a Bullseye glass color known for its chemical reactivity. We noticed a minor burnishing reaction with the copper decal and the french vanilla color - the decal was not shiny and had an oxidized look.
For the final fuse, the decals were both sandwiched in the middle of the 2 glass layers.

Test 9. The Double Decker Decal Sandwich. Both the black and copper decals are sandwiched in the middle, touching. We especially liked the translucent wing pattern provided by the copper, which became rather ghosted in the final fuse.
Thanks for tuning in.....
We hope you've enjoyed the Suspended in Amber series. The use of decals in fused glass is a relatively new and fluid art form and we hope you are feeling inspired!
Thank you for liking and sharing our tutorials and if you would like to hear about other tutorials we post in the future, consider signing up for our newsletter!