1 Comment

NEW Photographic Decals

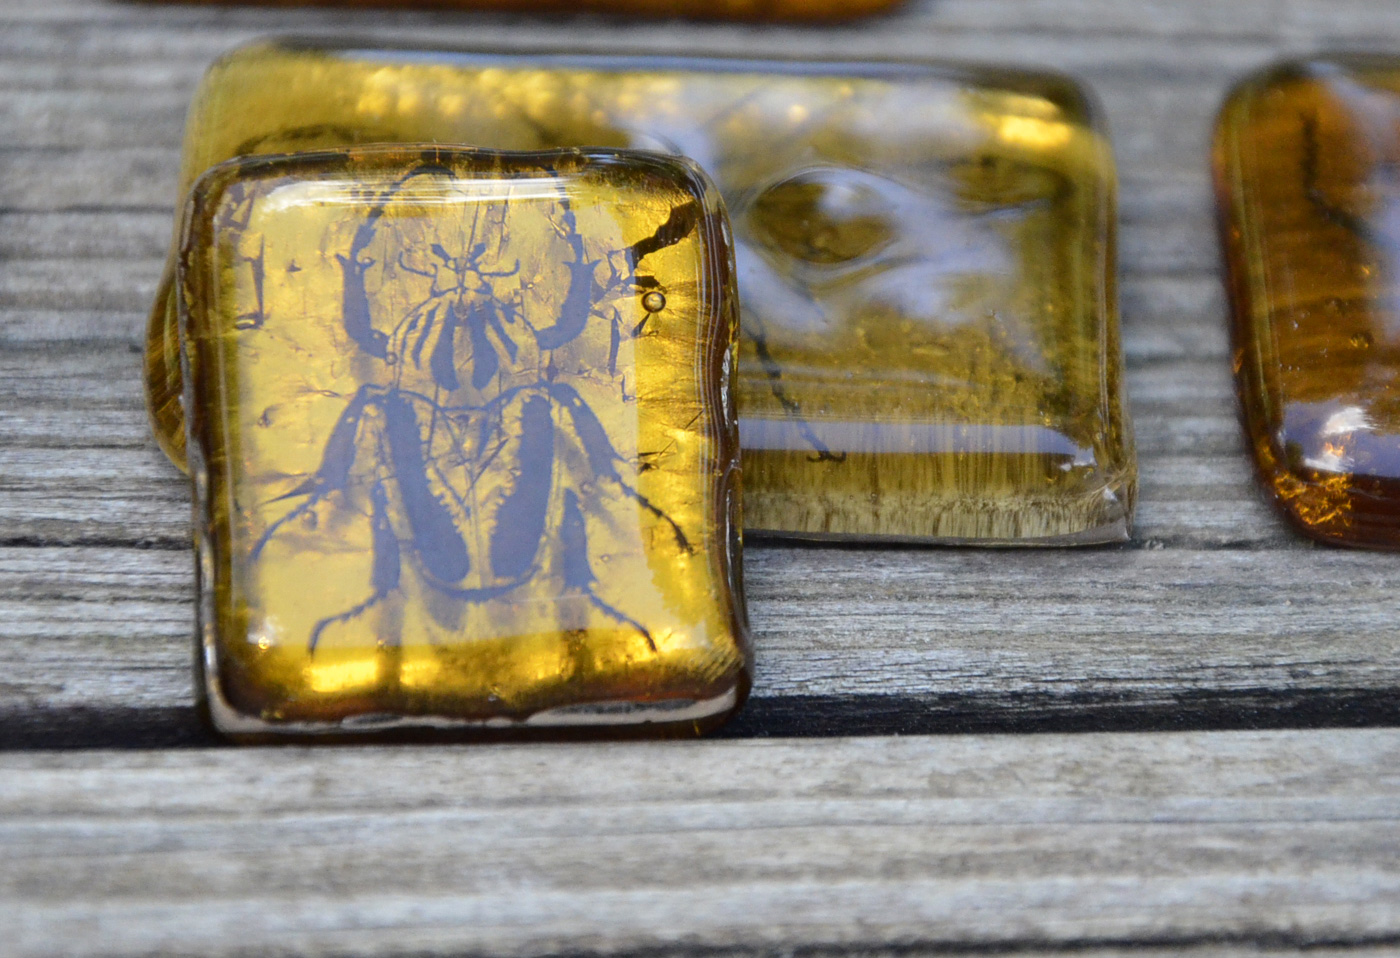
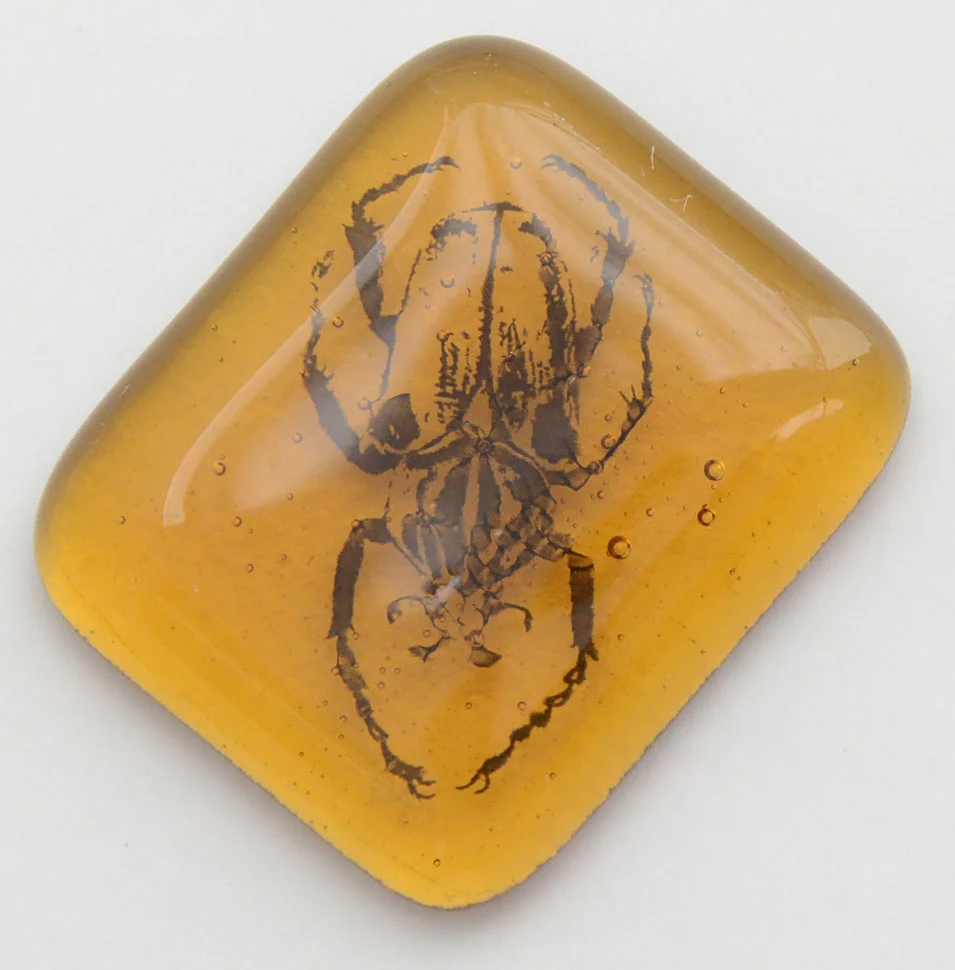
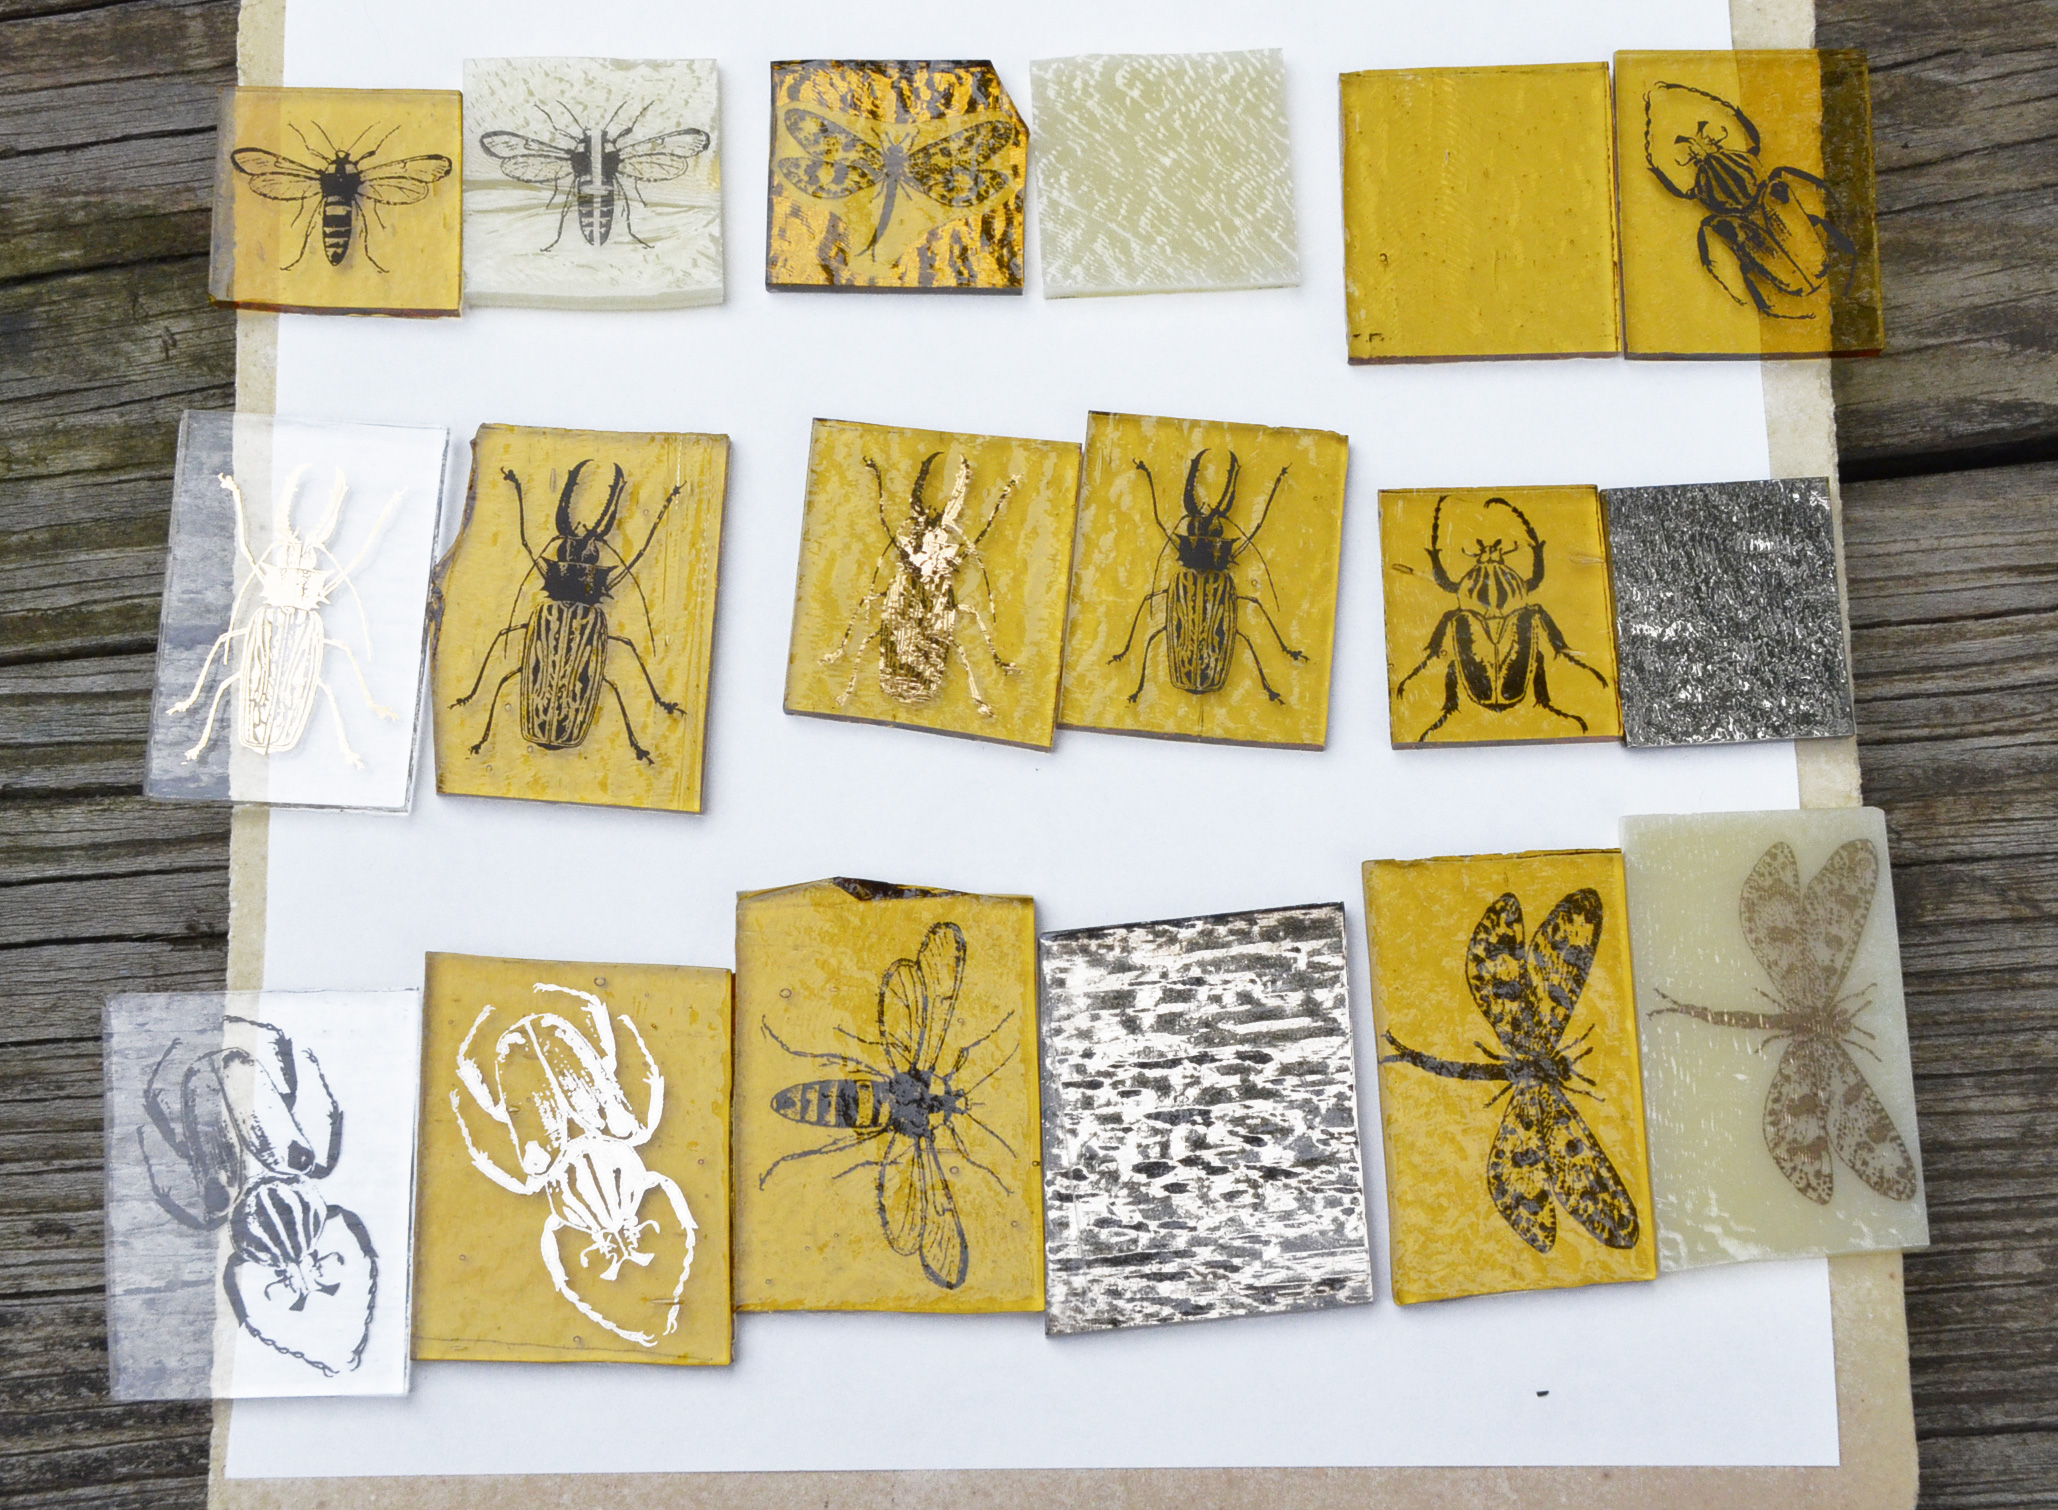
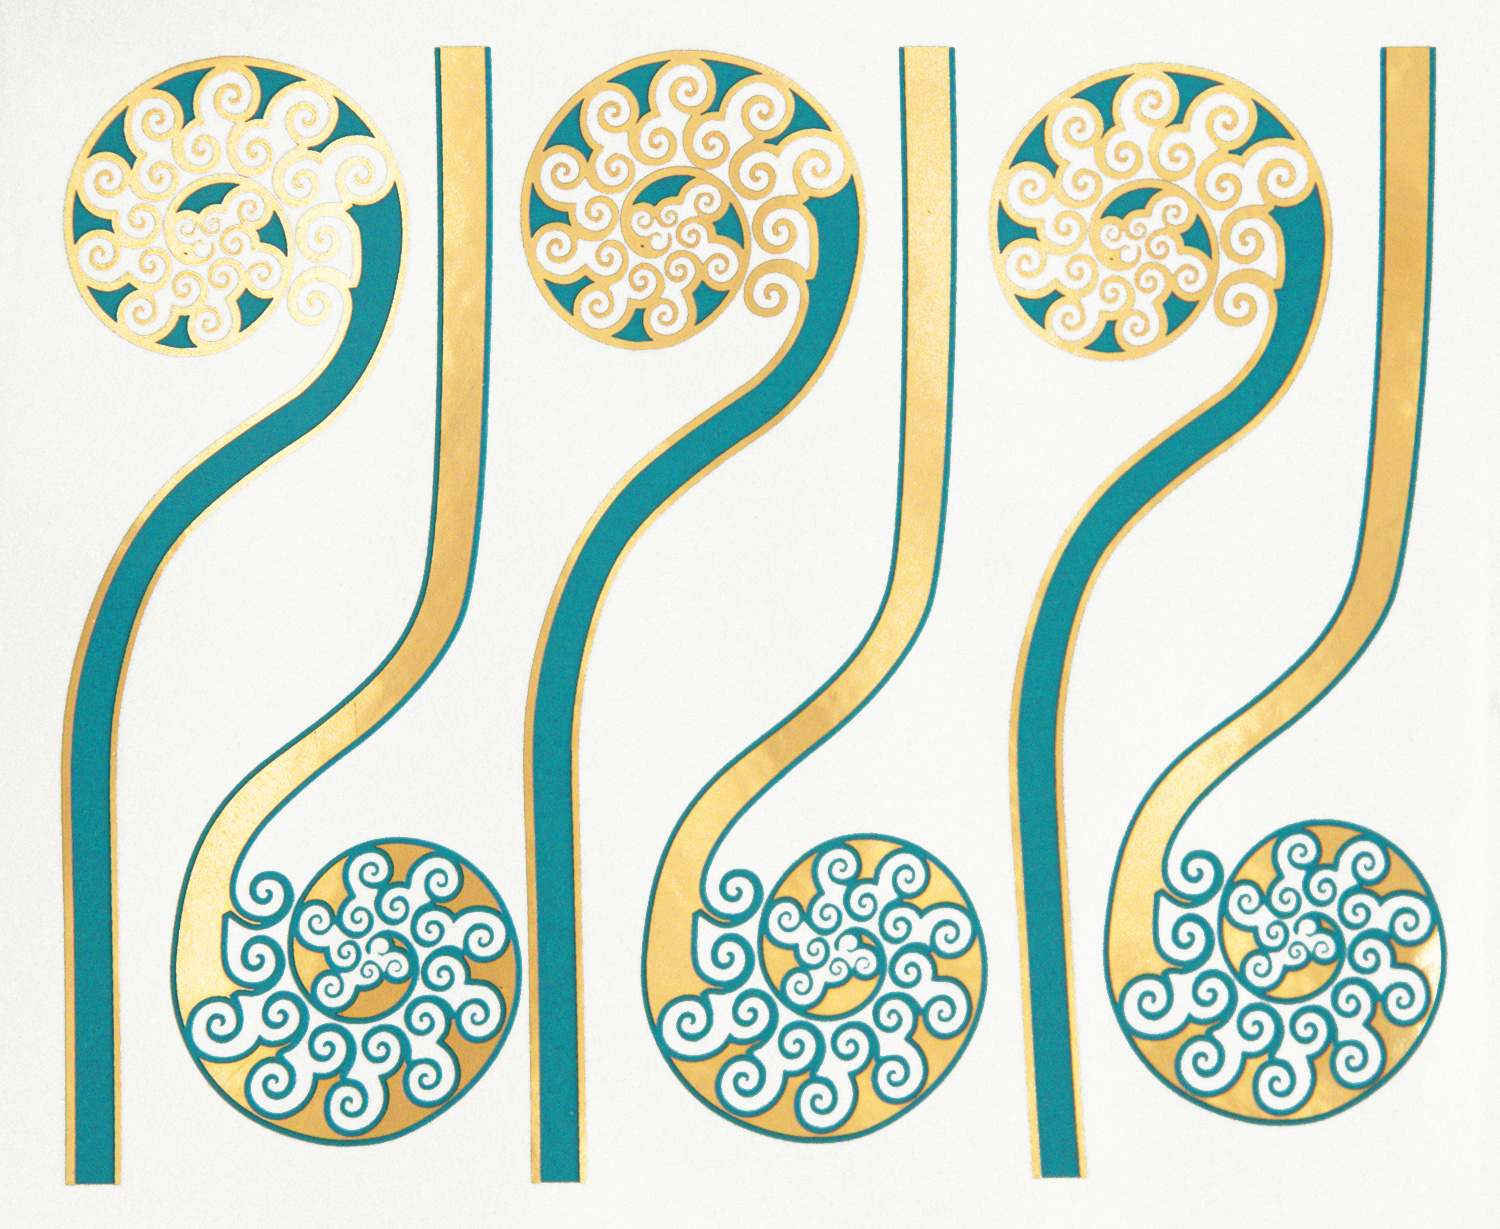
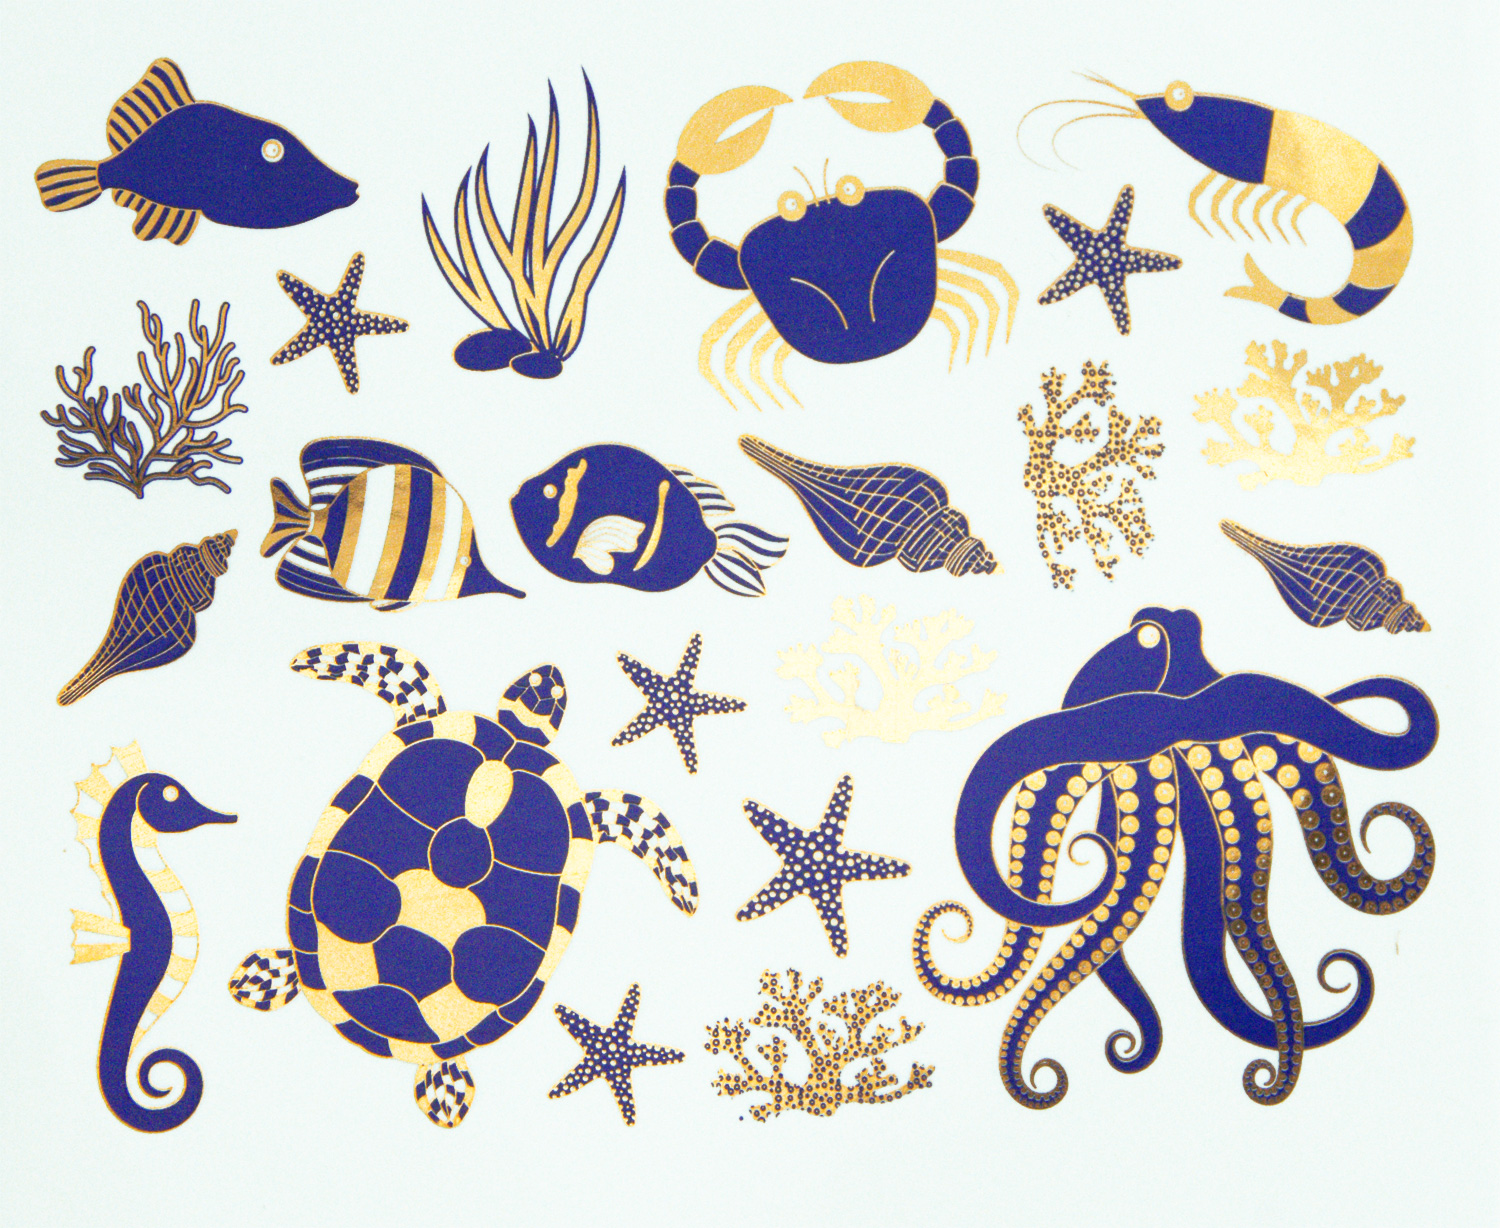
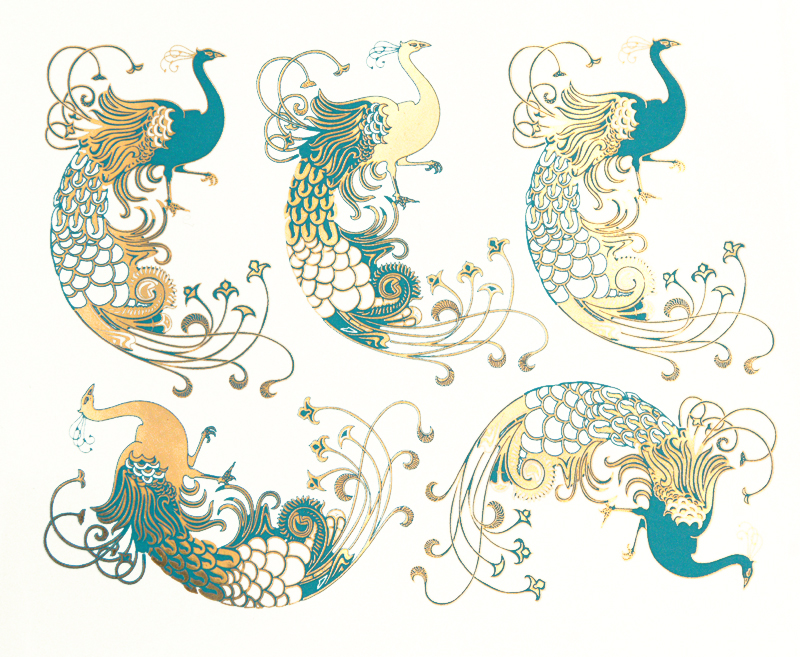
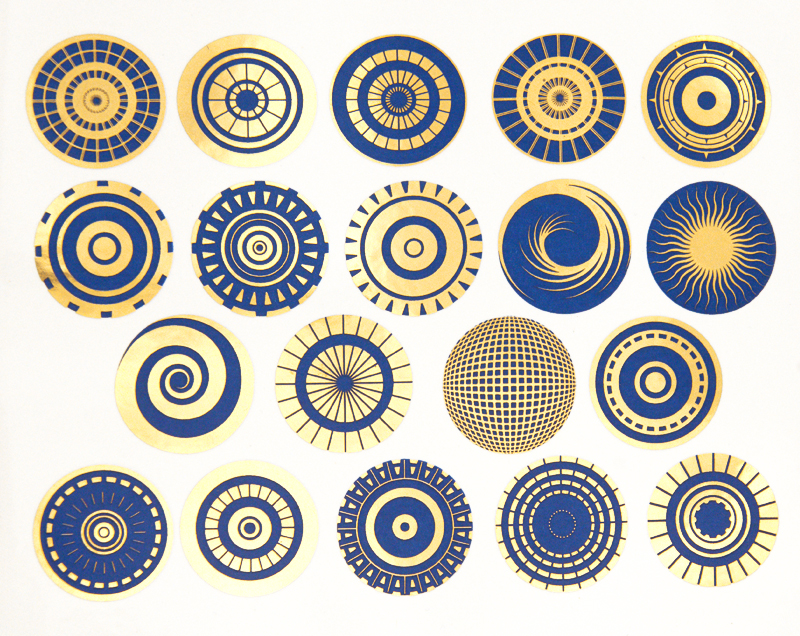
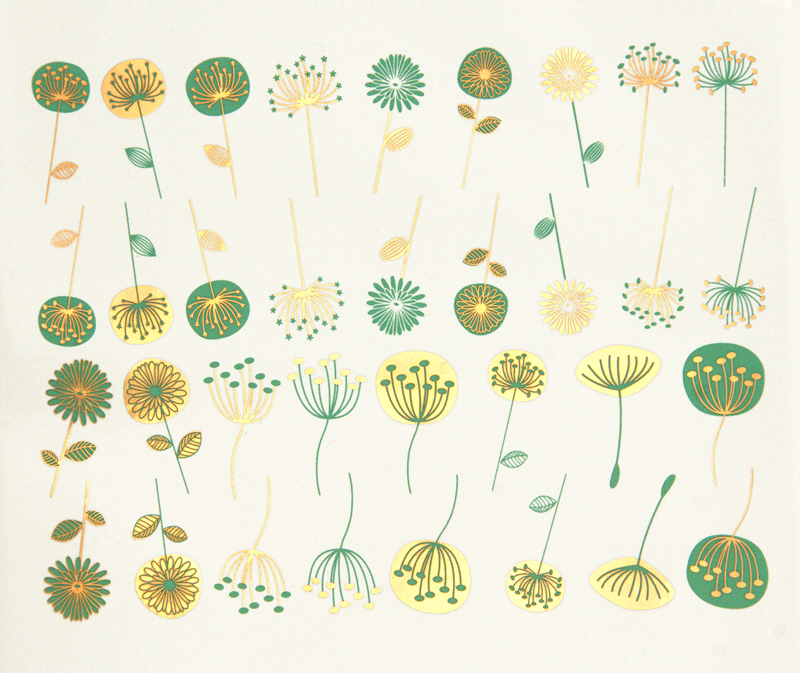
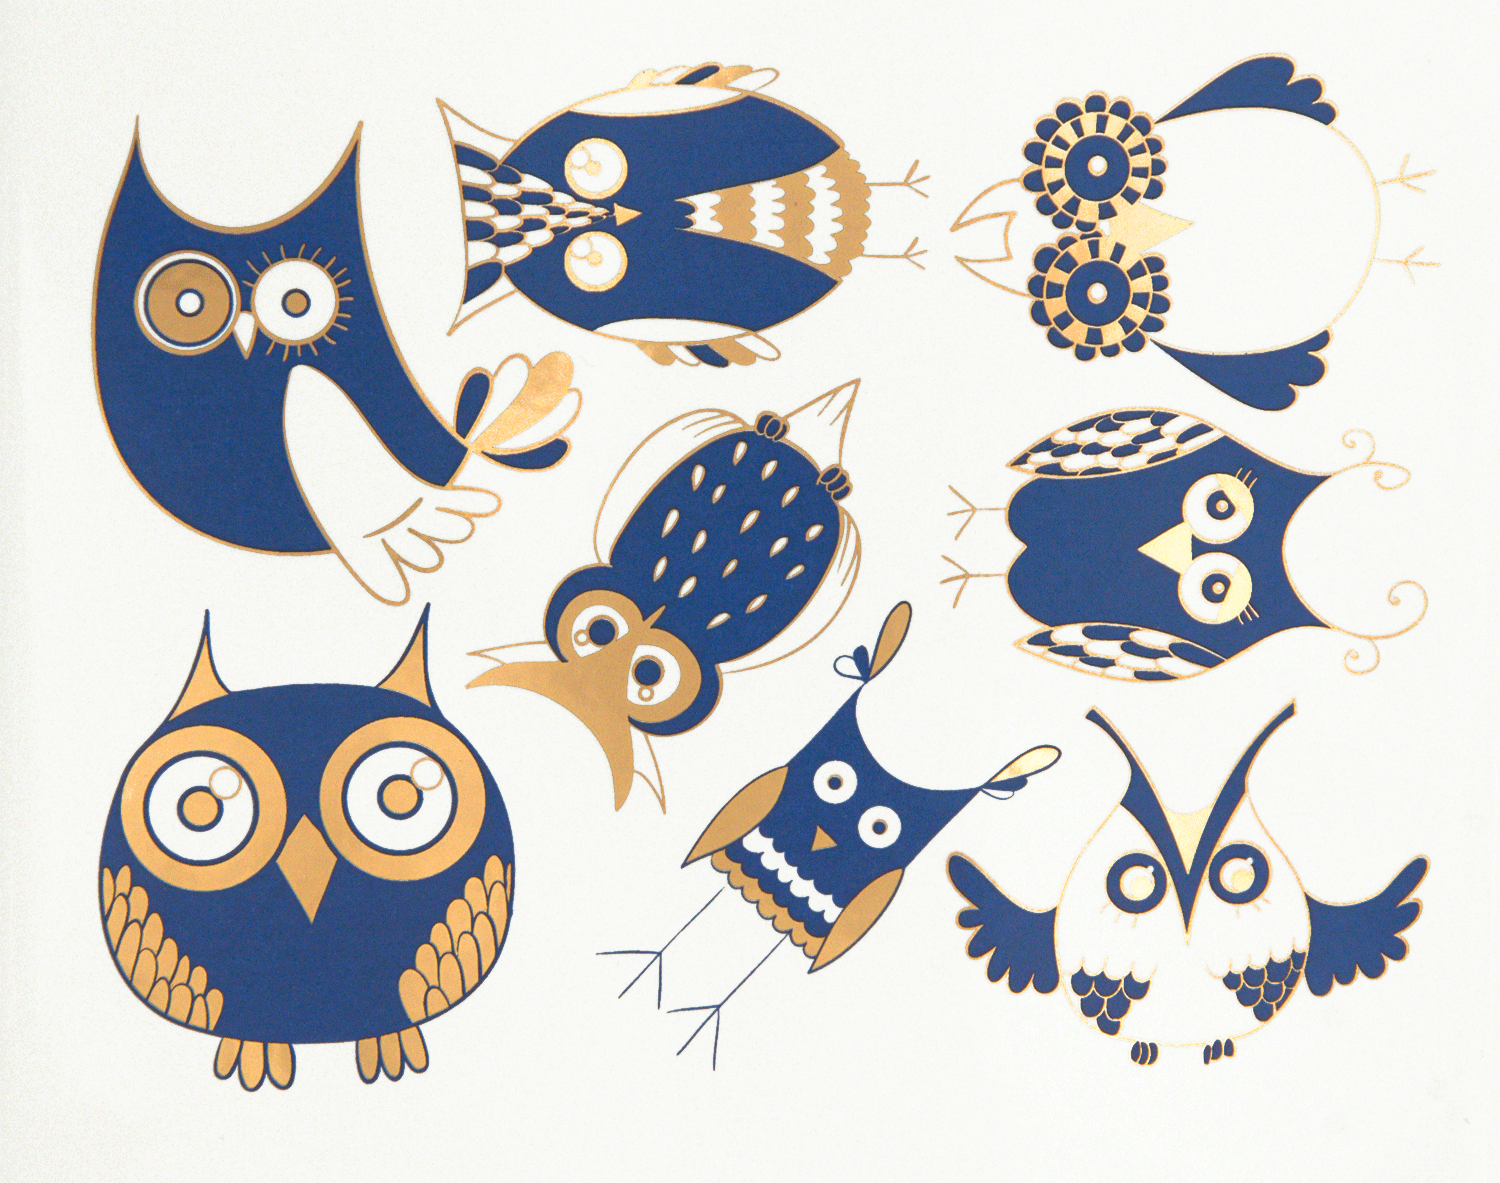
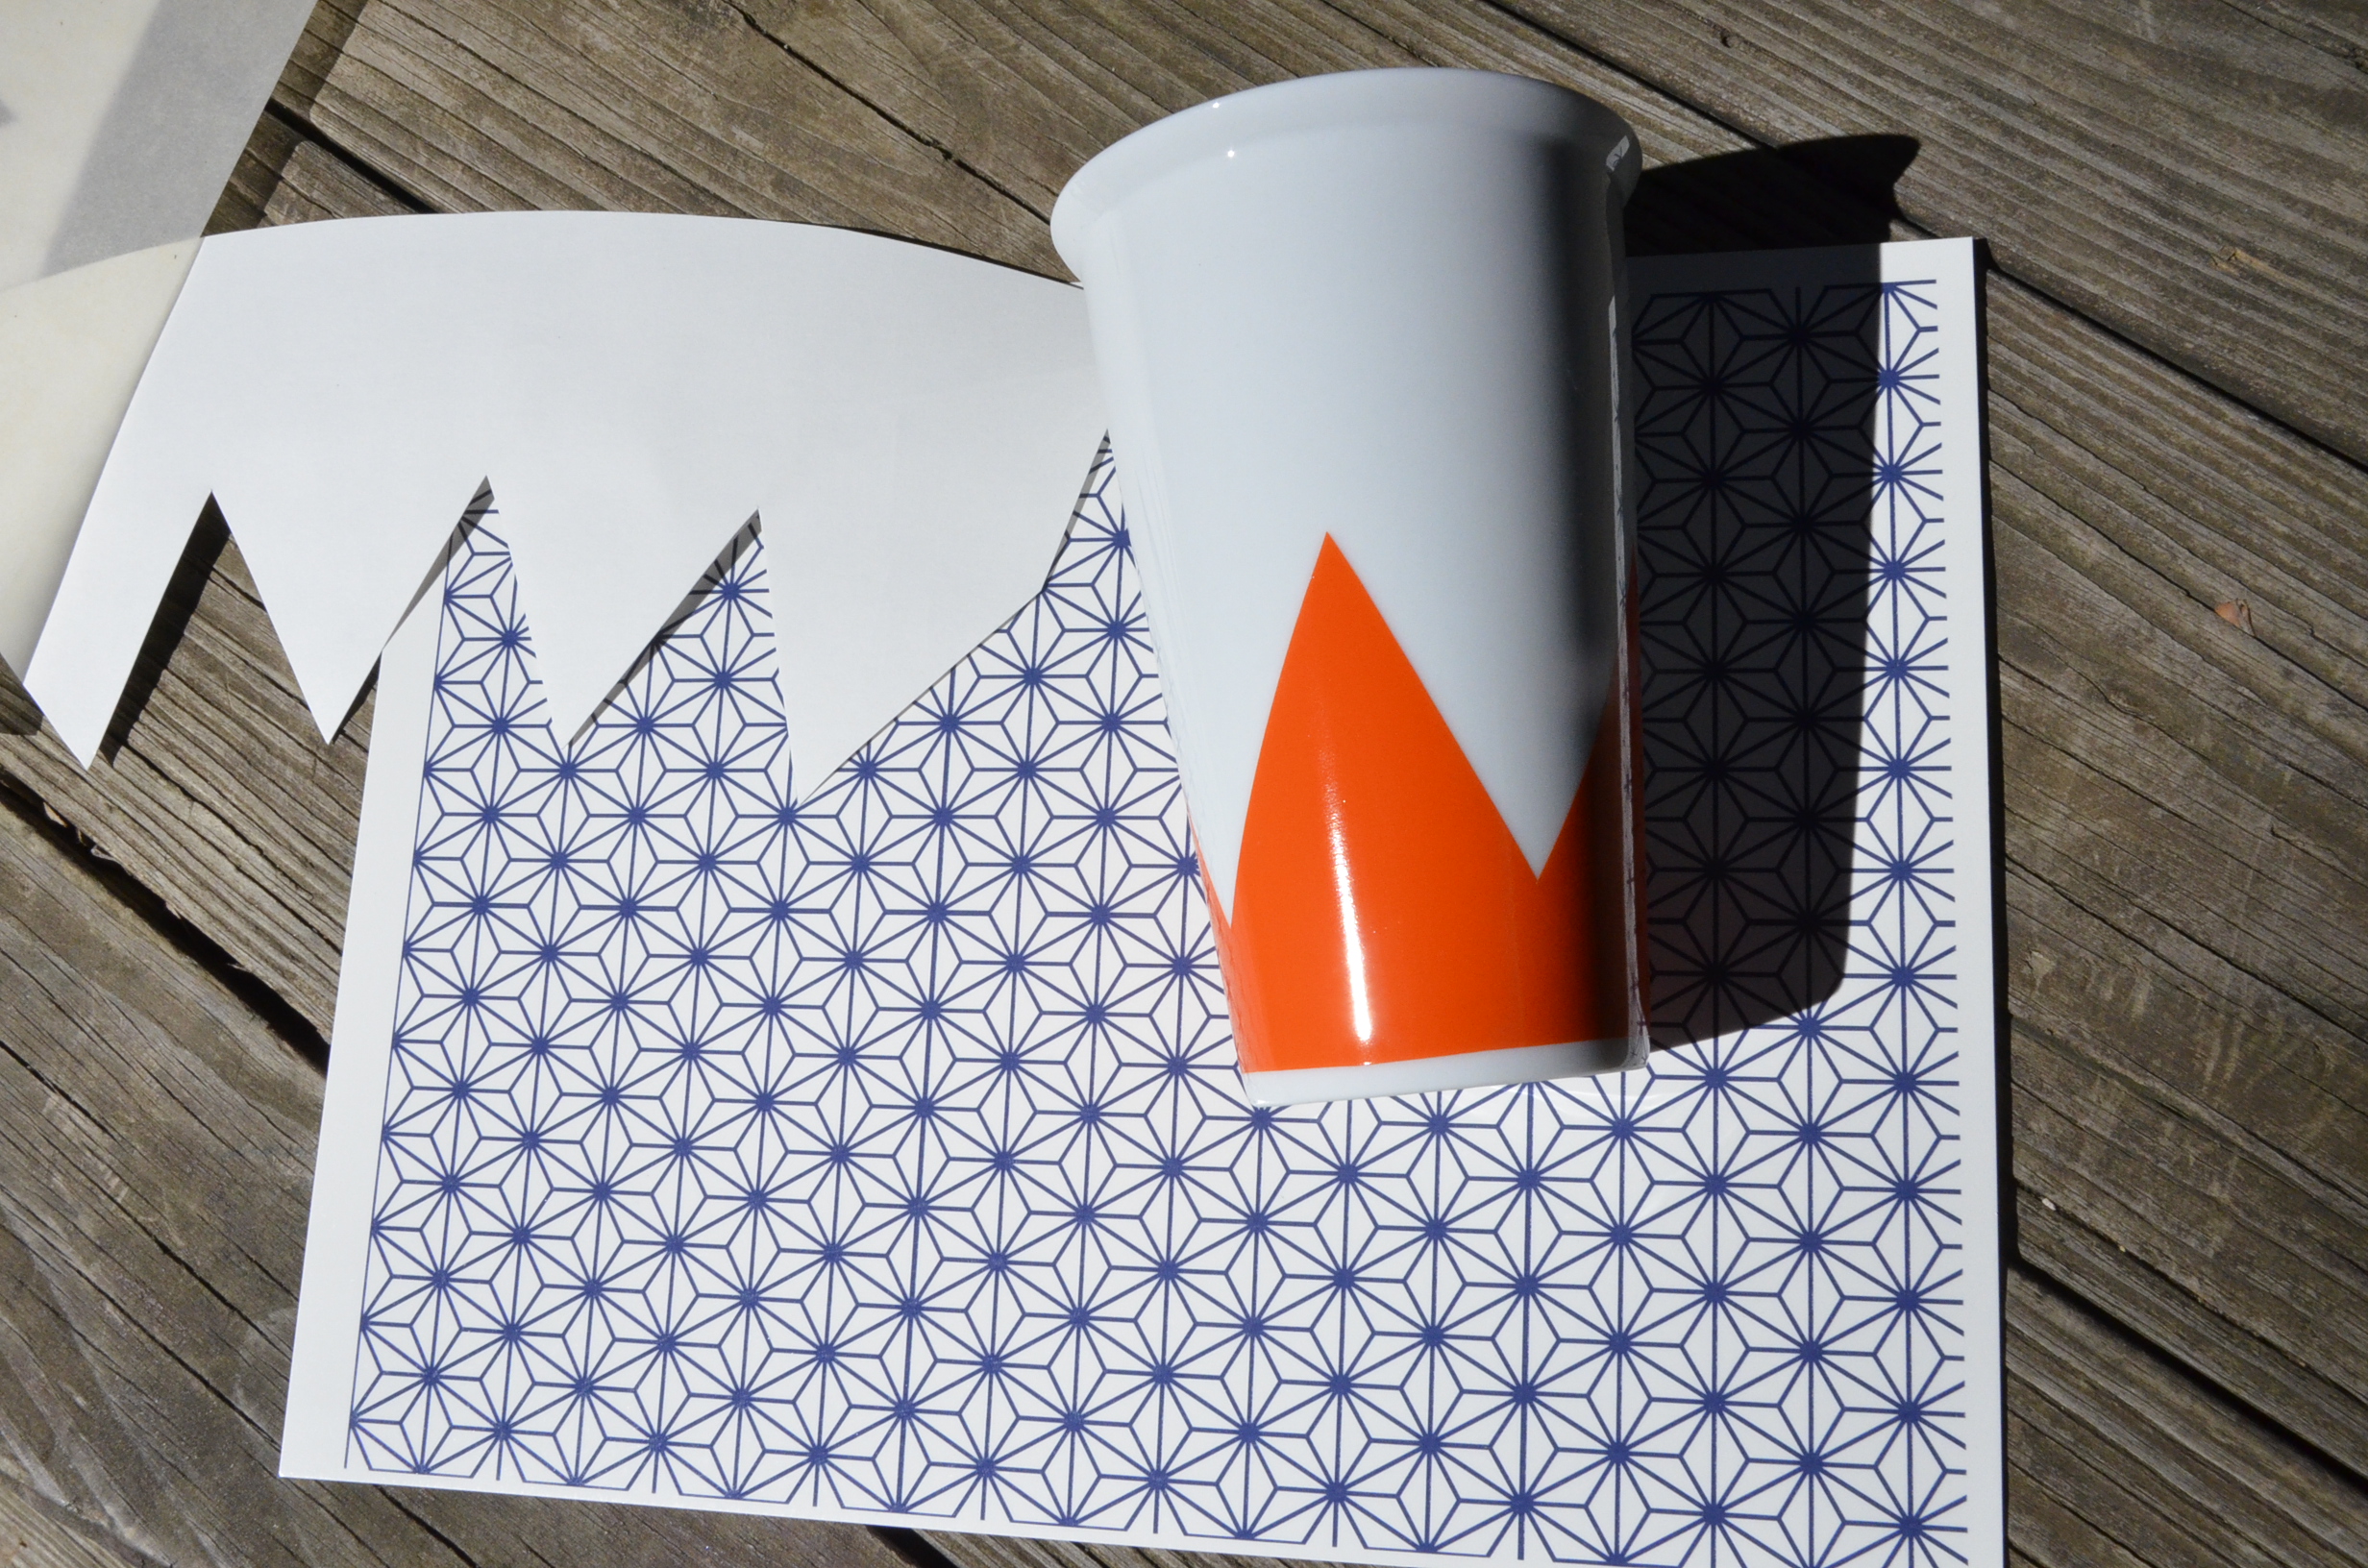
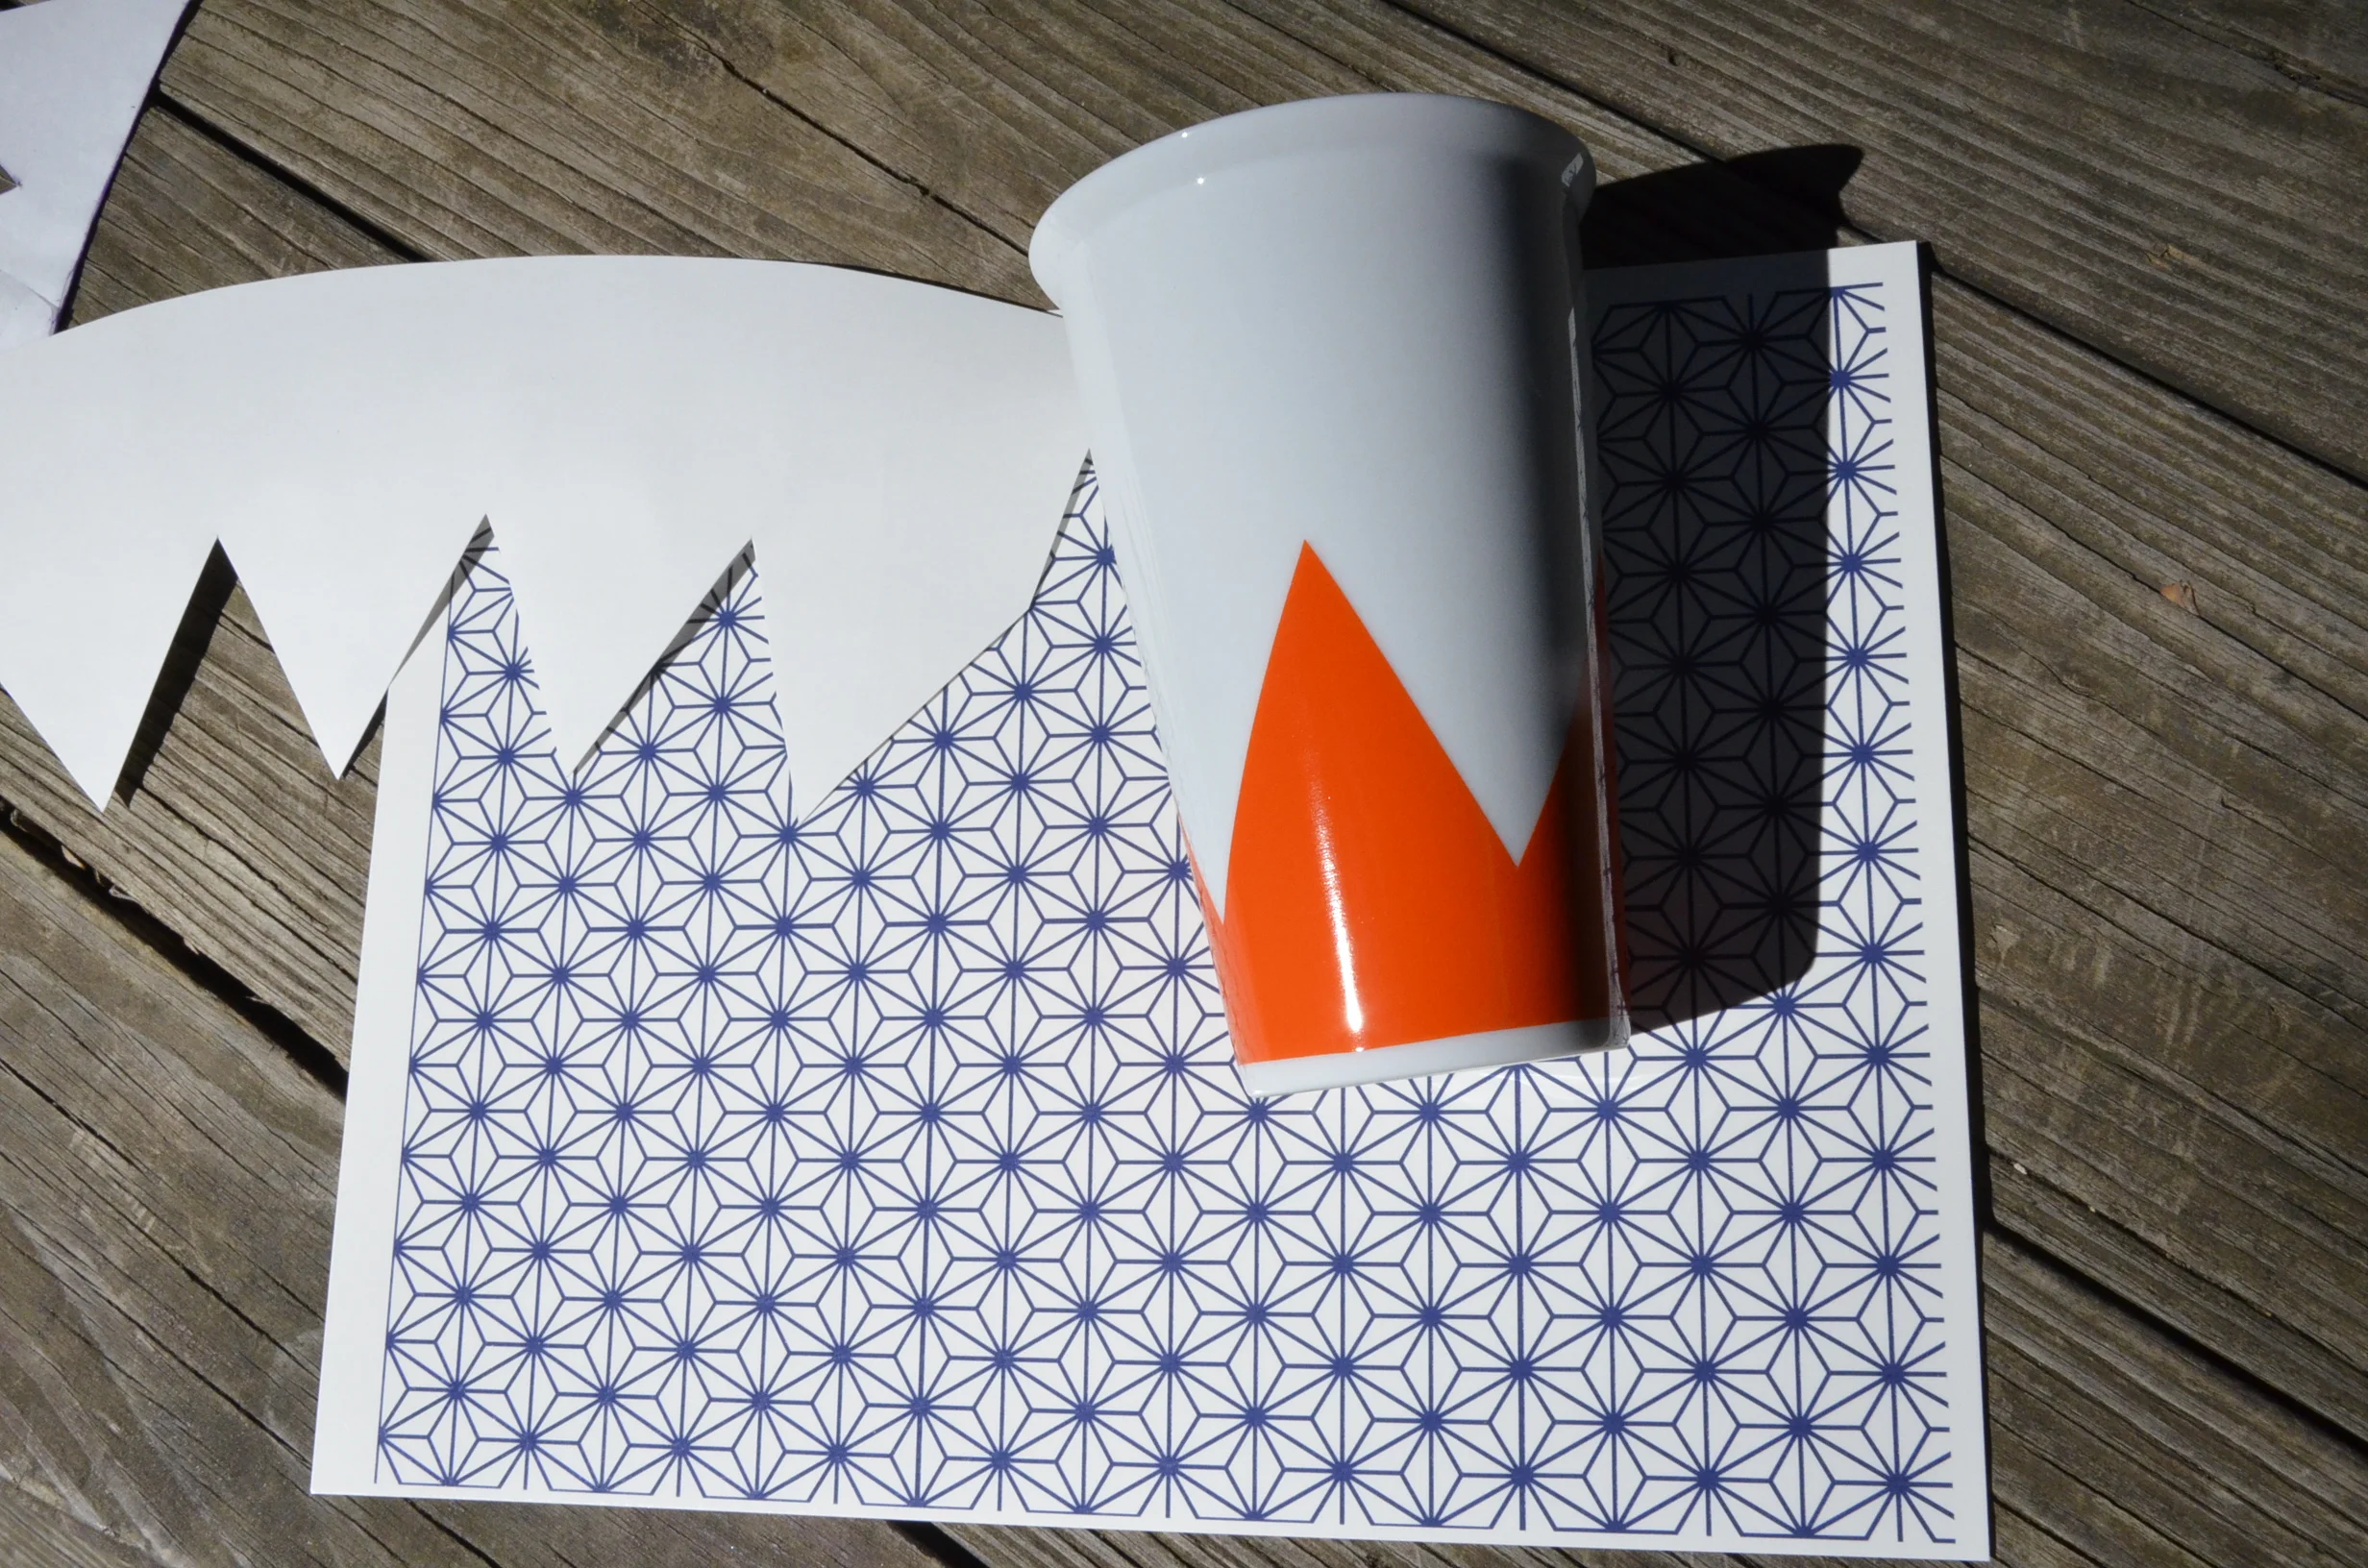
This week we've just added a slew of new decals in the shop and they are quickly becoming quite popular!  We offer these decals in three different sizes:

SMALL - Each sheet is 4 x 5.25 inch or 10.15 x 13.35 cm.  Each decal is 1.25 x 1.75 inch or 3 x 4.5 cm.
MEDIUM - Each sheet is 5 x 6.75 inch or 12.5 x 17.15 cm.  Each decal is 1.6 x 2.25 inch or 4 x 5.5 cm.  
LARGE - Each sheet is 6.25 x 7.5 inch or 16 x 19 cm.  Each decal is 2.25 x 3.25 inch or 6 x 8 cm. 

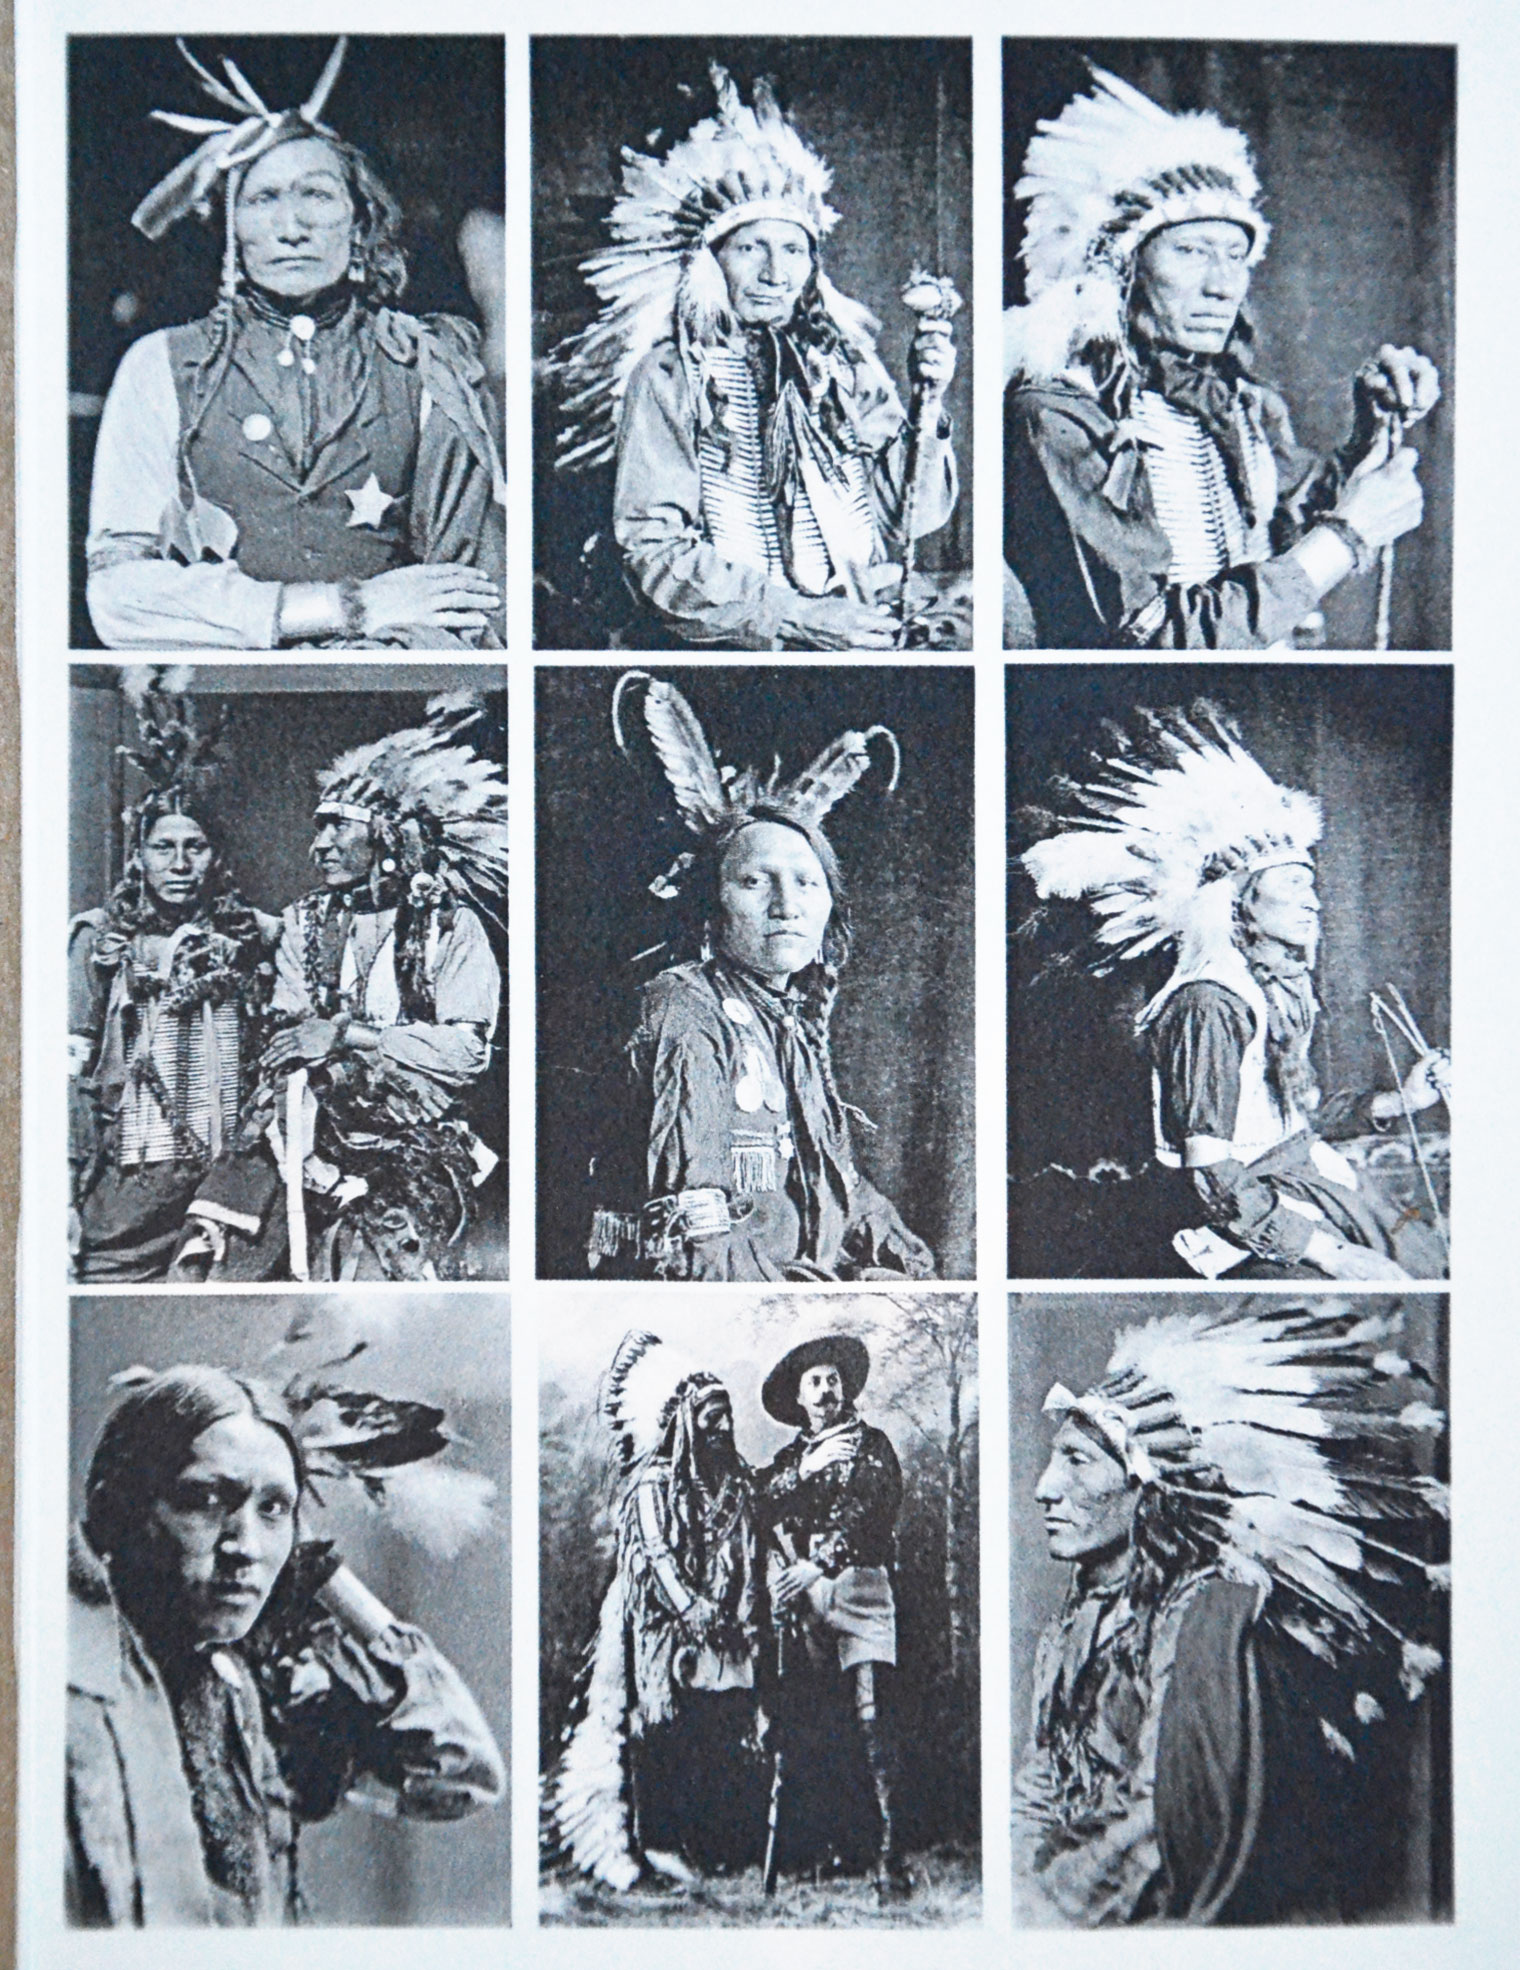
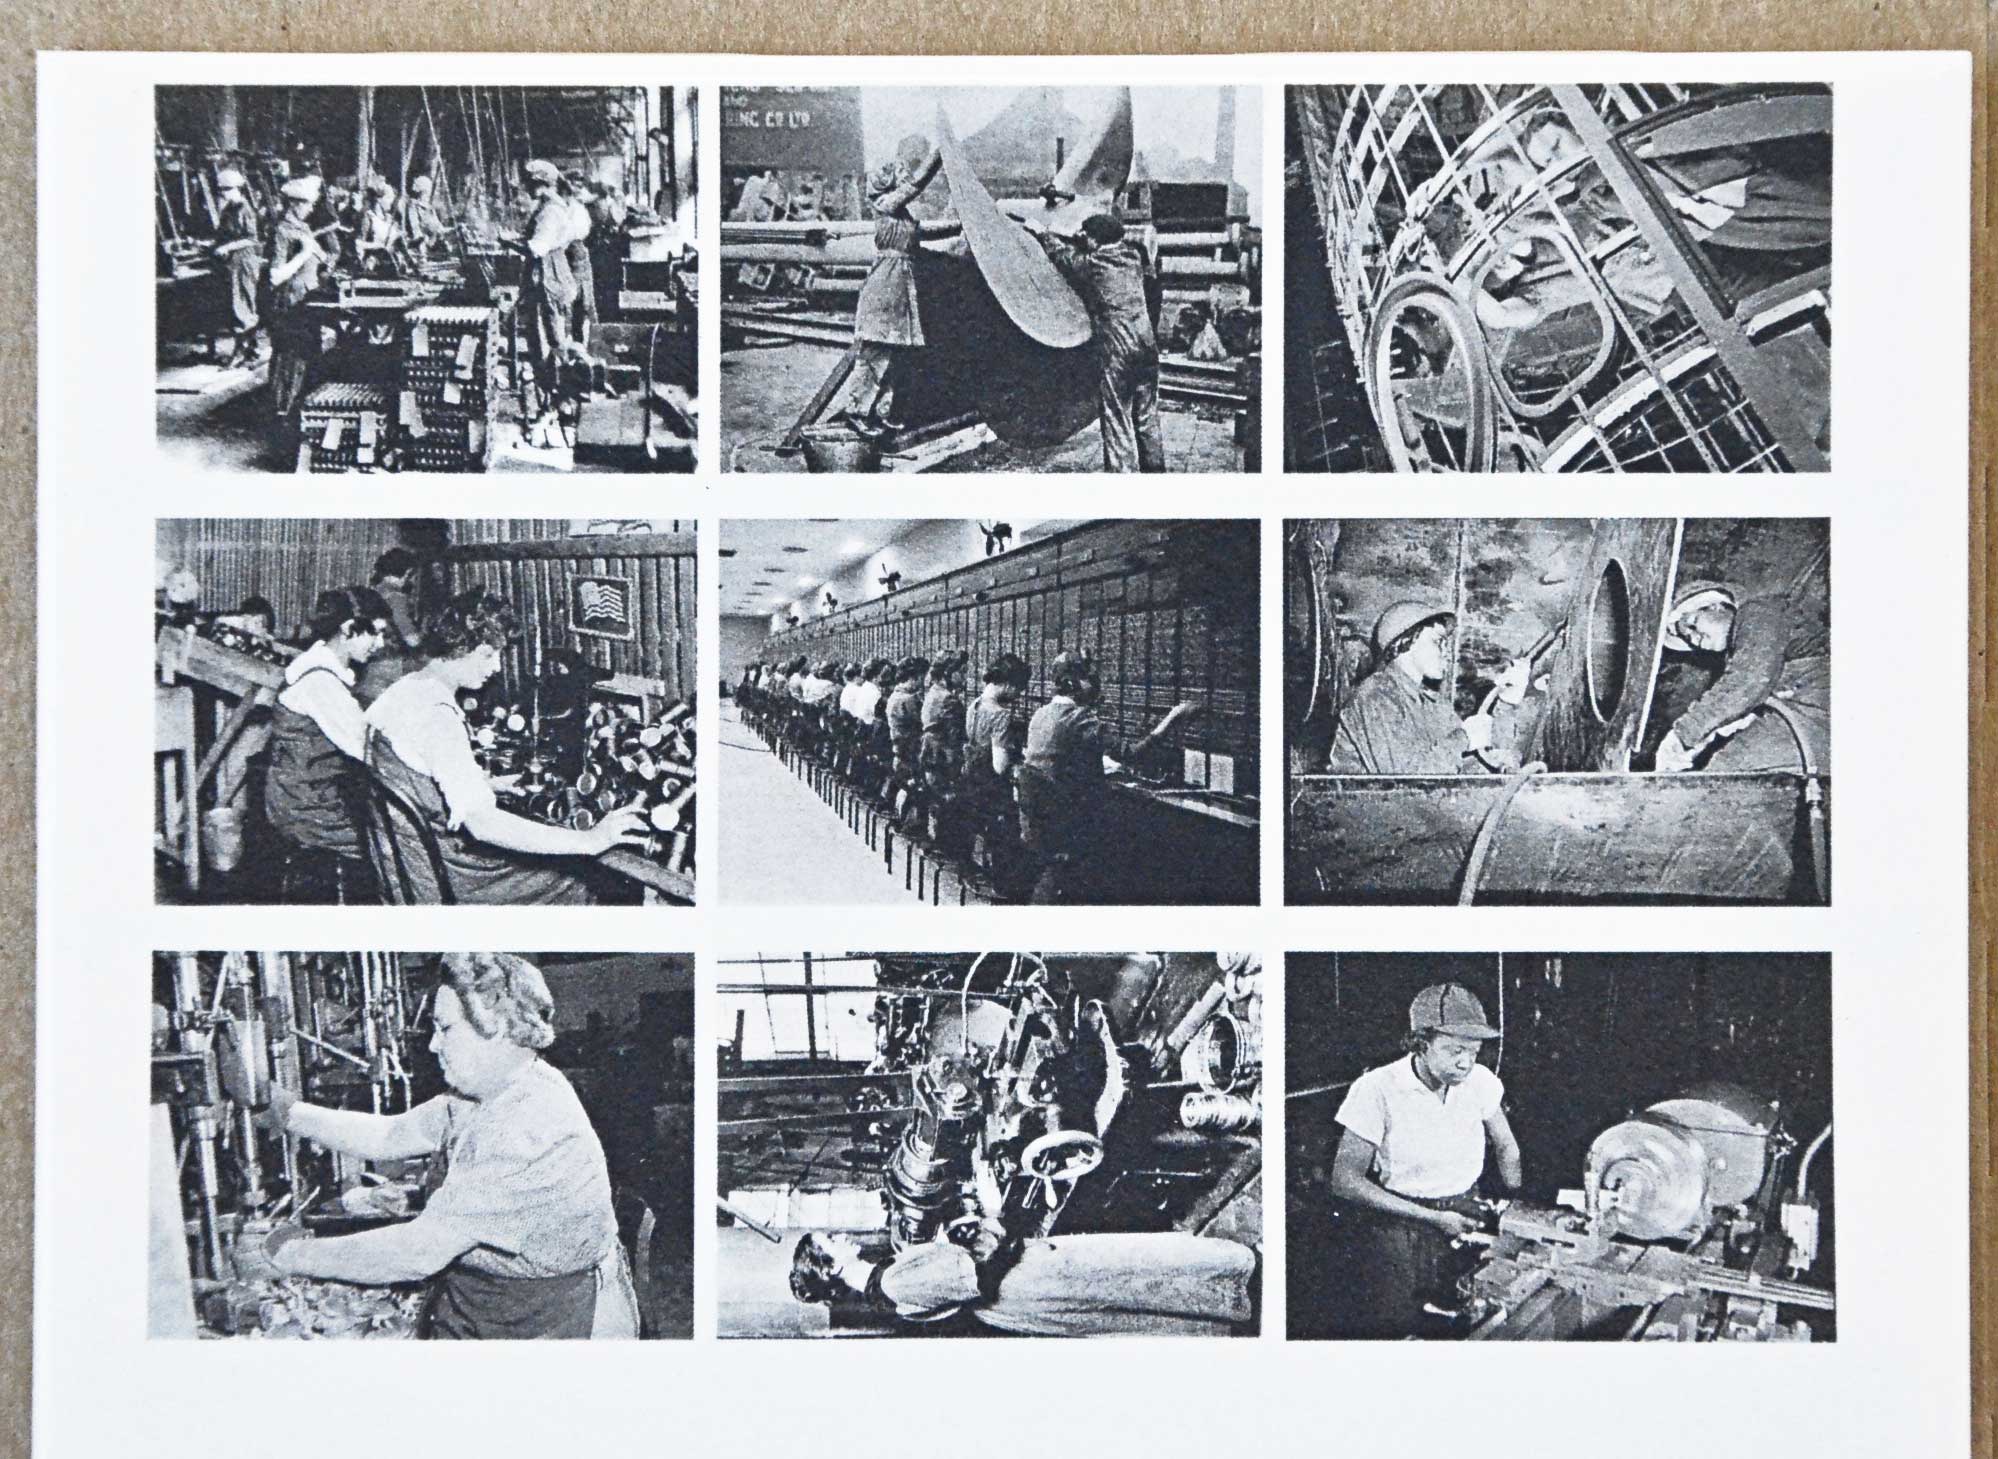
A lot of artists we work with may not realize that we can print photographic decals.  We print LOTS of custom decals using our client's own photos.  These custom photograph decals can be in their original color format, and we can also edit your color photos and transform them into Black and White format or even Sepia tone.

Like what you see?  Visit our Decal Shop to purchase them. 

Want to print your own photographic decals?  Click here to learn more.

1 Comment

Meet the Whites

Comment

Meet the Whites

Translucent White on the left.  Mica White on the right.

Translucent White on the left.  Mica White on the right.

A lot of customers are curious about the difference between Mica White and Translucent White.

When we first started printing decals we printed only in what we were then referring to as White, but what we now refer to as Translucent White.  (A Quick Diversion:  Commercial silkscreen decal printers are limited to the colors provided by our suppliers.   Yes, we can custom mix colors as well, but when it comes to white, there are limited options.) 

Why did we decide to rename White to Translucent White?  Traditional "White" ink was not very dense - especially on light to mid-tone ceramic glazes and enamel frits.  We even toyed with calling this color "Ghost White".  We really wanted to have a white that had a density that held up for glass customer though.  Enter: Mica White.

As you might have guessed, Mica White actually contains a bit of the mineral mica.  This addition makes a much denser white that is somewhat glittery.  On ceramics, mica white is also a bit matte and somewhat rough to the touch.

We love Mica White.  Translucent White is also great.  Most of our decals are available in either one or the other.  We hope that you, our dear fans,  all like them also.

Comment

Fused Glass Project: Suspended in Amber Pt. 3

2 Comments

Fused Glass Project: Suspended in Amber Pt. 3

Hi everyone!  Thanks so much for tuning in to part 3 of our fused glass tutorial series: Suspended in Amber. 

In this series we worked on an idea we had been chewing on for some time:  Using different colored insect decals and different colored glass (kindly provided by our friends at Bullseye Glass New York) to make glass pieces that looked like insects in amber.  

In total, we used 9 different glass and decal combinations to create an array of interesting and unique effects.  In Part 1 of this series readers will find an outline of the techniques we used as well as firing instructions.   In Part 2 of Suspended in Amber we discussed the different glass and decal combinations we used in tests 1-5

Now in the third and final installment of our series we will explain the glass and decal combinations we used in tests 6-9.  So without further ado, let's get started.

Amber with black decal on the left, clear glass with platinum full coverage decal on the right.

TEST 6.

In test 6 we used solid color platinum decal to create a reflective, mirror effect. 

In this case we pre-fired the black insect decal on amber glass.  We cut-to-shape a piece of platinum decal and pre-fired on clear glass. 

Check out the way that the decal on top reflects back from the platinum sandwiched between the layers!

For the final fuse firing, the platinum decal on the clear glass was sandwiched between the two layers of glass.  The black decal on the amber glass was the top-most layer of the stack.  I guess you could call test 6 The Platinum Sandwich

Test 6: The Platinum Sandwich was one of our favorites.  Reflections, depth and even some well-placed bubbles (purely accidental) give this Insect in Amber a very interesting look.  The way the platinum peeks out between the two glass laye…

Test 6: The Platinum Sandwich was one of our favorites.  Reflections, depth and even some well-placed bubbles (purely accidental) give this Insect in Amber a very interesting look.  The way the platinum peeks out between the two glass layers is also a very nice feature. 

Platinum decal on Amber and Black decal on Clear.

Platinum decal on Amber and Black decal on Clear.

TEST 7.

Once again, we are inspired by the depth that can be created with glass.  In this case we used the exact same decal in two different colors.  The topmost piece of glass (amber color) was pre-fired with a platinum decal and the bottom piece of glass was pre-fired with a black decal on clear glass. 

For the final fuse, we wanted to get the most possible depth, so we arranged the glass layers so that the black decal on the bottom-most clear glass was actually touching the kiln shelf.  The top-most platinum decal on the amber glass was on the very top.  No decal sandwiching was done in this test. 

Test 7. Shiny platinum appears to cast a black shadow in this depth-of-play piece.

The black insect was pre-fired onto the amber glass and the platinum full coverage decal was pre-fired onto the clear glass.  

The black insect was pre-fired onto the amber glass and the platinum full coverage decal was pre-fired onto the clear glass.  

TEST 8.

For test 8, we revisited platinum full coverage decal.  In test 6 (previously in this post), we sandwiched the platinum between the glass layers.  For test 8, we decided to fire the platinum on the very bottom-most layer of the glass with the platinum itself actually touching the kiln shelf.

Test 8 on the left.  The platinum seems to have burned away a bit during the final fuse firing, whereas the platinum in test 6 on the right retains its full character and color.  Also note the interesting image distortion in the black inse…

Test 8 on the left.  The platinum seems to have burned away a bit during the final fuse firing, whereas the platinum in test 6 on the right retains its full character and color.  Also note the interesting image distortion in the black insect decal on the left, which was sandwiched between the 2 glass layers .  The insect on the right sat atop the glass during final fuse and thus exhibits no distortion.

Black decal on amber glass and copper decal on french vanilla after the pre-firing.

Black decal on amber glass and copper decal on french vanilla after the pre-firing.

TEST 9.

For this test we pre-fired a black decal on amber glass and a copper decal on french vanilla, a Bullseye glass color known for its chemical reactivity.  We noticed a minor burnishing reaction with the copper decal and the french vanilla color - the decal was not shiny and had an oxidized look.

For the final fuse, the decals were both sandwiched in the middle of the 2 glass layers.

Test 9. The Double Decker Decal Sandwich.   Both the black and copper decals are sandwiched in the middle, touching.  We especially liked the translucent wing pattern provided by the copper, which became rather ghosted in the final fu…

Test 9. The Double Decker Decal Sandwich.   Both the black and copper decals are sandwiched in the middle, touching.  We especially liked the translucent wing pattern provided by the copper, which became rather ghosted in the final fuse. 

Thanks for tuning in.....

We hope you've enjoyed the Suspended in Amber series.  The use of decals in fused glass is a relatively new and fluid art form and we hope you are feeling inspired! 

Thank you for liking and sharing our tutorials and if you would like to hear about other tutorials we post in the future, consider signing up for our newsletter! 

All Together Now!  All 9 tests from the Suspended in Amber tutorial series.  To learn about basic technique and firing schedule, read Part 1 of our series.  Details about each of the 9 different insects are described in Part 2 and Part 3 of the series. 

2 Comments

Fused Glass Project: Suspended in Amber Pt. 2

Comment

Fused Glass Project: Suspended in Amber Pt. 2

Hey there loyal readers.  This here is part 2 of our fused glass tutorial series Suspended in Amber.

We divided this series into 3 parts.  Part 1, where we talk about technique and firing, is here.   Part 3, where we describe technique for tests 6-9, is now live. 

So lets get started shall we?   For this series, we really wanted to play with the interesting characteristics unique to glass: depth, flow and bubbles.  We tried nine different permutations of the amber insects

Test 1 after the decals were pre-fired and before final fuse.

Test 1 after the decals were pre-fired and before final fuse.

Test 1. 

The decals were pre-fired on both pieces of glass.   Notice that we cut one of the decals down the middle and spread each half out, leaving a 2mm gap between.  The two layers of glass were arranged so that the decal on amber layer is on top and the decal on the french vanilla was sandwiched between the two layers.  Check out the results of the final firing below.

Test 1 final fuse. We were very happy with the depth in this piece.  Check out that 3D effect from where we cut the decal in two and spread the halves slightly.  Awesome!

Test 1 final fuse. We were very happy with the depth in this piece.  Check out that 3D effect from where we cut the decal in two and spread the halves slightly.  Awesome!


Test 2. 

Test 2 Final fuse.  Yes, the amber piece wasn't cut all that well.  We were just making some tests so we decided to go with is. 

Test 2 Final fuse.  Yes, the amber piece wasn't cut all that well.  We were just making some tests so we decided to go with is. 

Test 2. Here we show the amber face up on top.  We flipped it over, as shown on the bottom there, to fire on top of the french vanilla.

Test 2. Here we show the amber face up on top.  We flipped it over, as shown on the bottom there, to fire on top of the french vanilla.

This piece had some interesting unintended effects.  First we pre-fired the black insect onto the amber glass.  Then, in a second pre-firing, we covered that whole layer with the insect decal with a solid rectangle of platinum decal.  We were very surprised to see that the insect decal reacted with the platinum, which completely disappeared in that second pre-firing.  Weird.

The final fuse came out pretty nice though.


Test 3.  Isn't that scarab just the cutest!?

Test 3.  Isn't that scarab just the cutest!?

test 3

This was a pretty straightforward piece.  The black insect was pre-fired on amber and then sandwiched underneath an unadorned amber layer for the final fuse.  We were really trying to maximize bubbles in this one so we made sure that the rough side of the glass were touching in the middle of the decal sandwich.  Mmmnnnn!  Deliciously bubbly!

Test 3 final fuse.  Bubblicious! 

Test 3 final fuse.  Bubblicious! 


Tests 4 and 5

These two tests are similar except for the fact that the top glass for test 4 is clear and the top glass for test 5 is amber.  These two tests show well the different tones of amber one can achieve.  Additionally, we trimmed about a 1mm strip from the gold decal on the clear glass to hopefully add some 3D effect.

Test 4 on the left.  The clear with gold decal will go on top of the amber with the black decal.  Test 5 on the right.  The amber with gold decal will go on top of the amber with black decal.

Test 4 on the left.  The clear with gold decal will go on top of the amber with the black decal.  Test 5 on the right.  The amber with gold decal will go on top of the amber with black decal.

We can't tell which we like more!  Which is your favorite? 

We can't tell which we like more!  Which is your favorite? 

Like what you see?  Check out the final part 3 of this series here.  And don't forget to sign up for our newsletter for future tutorial news, sales and more! 

Comment

Fused Glass Project: Suspended in Amber Part 1

5 Comments

Fused Glass Project: Suspended in Amber Part 1

One of the best things about our line of work is we get to experiment with different mediums.  When we first started Milestone Decal Art in 2008, we were almost exclusively working with ceramic and porcelain.  Soon we started playing with glass and we have not looked back ever since.  What we love most about glass is the fluidity and transformation that happens in the kiln.  Waiting for the kiln to cool down after we've done a glass firing is always a very exciting time...

Follow our three part series:  Suspended in Amber to learn some interesting new glass fusing decal techniques.

A while back we took a class at our local Bullseye Glass Resource Center here in New York where we used some amber colored glass.  Of course we couldn't help but think about our insect decals and how *awesome* they would look suspended in that beautiful amber.  So we shared our idea with the wonderful staff at Bullseye and they in turn shared some glass to help us see where we could go with our "big idea".  One of our favorite things about Bullseye Glass is their commitment to supporting artists to explore the possibilities of glass as a medium.  Using decals with hot glass is an emerging form and we have enjoyed a very supportive relationship with the great people at Bullseye.  You can also buy our decals in their online shop as well as their Resource Centers.

For the Suspended in Amber project we tested 9 different combinations.  Because we will be going into great detail for each of these 9 combinations, we will be reporting on our results in a three part series.

So without much further ado, let's get down to the nitty gritty.

For this project you will need two equally sized pieces of glass.

For this project you will need two equally sized pieces of glass.

The technique

For this technique we used insect decals in Black, Gold, Platinum and Copper. 

For glass we used combinations of Bullseye 3mm Medium Amber, Clear Transparent, French Vanilla, and Opaque White

The tools we used were a Toyo cutter, a straightedge, running pliers, and the ever useful sharpie maker.


For this project we layered 9 different pairs of glass rectangles. The leftmost piece of glass in each pair was fired on top.  The rightmost piece of glass in each pair was fired on the bottom.  Make sure to read all three parts of this th…

For this project we layered 9 different pairs of glass rectangles. The leftmost piece of glass in each pair was fired on top.  The rightmost piece of glass in each pair was fired on the bottom.  Make sure to read all three parts of this three part series to see our results.

DECAL PRE-FIRING SCHEDULE.  This is the firing schedule we use to fuse the decal without melting or slumping the glass.  You can also use this schedule to fire a decal on a piece that you have already fully fused or slumped.

DECAL PRE-FIRING SCHEDULE.  This is the firing schedule we use to fuse the decal without melting or slumping the glass.  You can also use this schedule to fire a decal on a piece that you have already fully fused or slumped.

Step 1.  Measure and cut your glass to fit the decal. 

Step 2. Apply your decal.  You can find our application instructions here.

Step 3.  Fuse your decal to your 3mm glass piece using our decal pre-firing schedule for glass.

Step 4. You will now add a second layer of glass for the final fuse firing.  At this step you have several options depending on what look you would like to achieve - sandwiching a decal between two pieces of glass; having a decal on the top most layer as well as sandwiched in the middle; or even having a decal on the underside of the lower glass layer are all possible options.  Play with it and have fun!

DECAL FINAL FUSE FIRING SCHEDULE.  This is the schedule we use for final fusing. 

DECAL FINAL FUSE FIRING SCHEDULE.  This is the schedule we use for final fusing. 

Step 5.  Use Glasstac between your glass layers to ensure that your glass doesn't shift during firing.

Step 6.  Fire your glass according to the final fuse schedule.


Et VOILA!  The results of our final fuse firing.  Please visit parts 2 and 3 of this post to learn about the specifics of each individual piece.  Let us know what you think in the comments area of this post!

Et VOILA!  The results of our final fuse firing.  Please visit parts 2 and 3 of this post to learn about the specifics of each individual piece.  Let us know what you think in the comments area of this post!

5 Comments

Comment

Rock out with Two-Tones!

Here at Milestone Decal Art, we are always working on new and interesting decals for artists and designers to use in their work.  It takes time to keep things fresh, but we have just about a googolplex of ideas.  But between that idea and your ceramic or glass ware there are a few very important steps.

First, we've got to do the design work.  This takes a lot more time than it may seem.  You see, we don't just buy universally available stock images.  We want to make decals that are different.  So we spend hours developing the images we use.  We then test-print and test-fire.  Once we are finally happy with the decal, we fire them on white ceramic, photograph them, measure and describe them and put them for sale in our online shop.  Phew.  I'm tired just reading all that! 

Luckily, by the time you are seeing the photos, all that behind-the-scenes stuff is out of the way.  So after some weeks of R&D we are happy to share with you our new, expanded line of Two-Tone Decals.  Available in three different colorsets in our shop - Turquoise+Gold, Emerald Green+Gold, and Delft Blue+Gold.  All gilded with 22 Karat, conflict-free precious gold and printed in the US.! 

We hope you like them!  Let us know what you think?  Happy creating!

Comment

Have Decals, Will Travel:  Greenwich House Pottery

1 Comment

Have Decals, Will Travel: Greenwich House Pottery

Earlier this month, I had an exciting field trip down to Manhattan's West Village to the wonderful Greenwich House Pottery

This non-profit pottery studio is a bright and spacious ceramic creation space founded by fascinating early 20th century dynamo Mary Melinda Kingsbury Simkhovitch.  

Simkhovitch founded Greenwich House in a poor tenement building in 1902 with her husband, a Russian-born university professor.  She lived out her days there overseeing the creation of an invaluable community space in one of New York City's then poorest areas.  Greenwich House provided the local population with a "kindergarten,  infant wellness clinic, playground, and library, as well as offering classes in pottery, painting, sculpture, music, and more."  Today Greenwich House still continues Mary Simkhovitch's original mission, providing invaluable space for social outreach, community service and a variety of art programs.

Young ceramic artists shaping mud at Greenwich House Pottery, circa 1944.

Young ceramic artists shaping mud at Greenwich House Pottery, circa 1944.

Erika in the house!  Greenwich House, that is.

Erika in the house!  Greenwich House, that is.

Greenwich House kindly opened its studio doors to me to teach a workshop titled "Advanced Decal Application".  Students looked on and asked questions while I presented a technique for applying large-sized decals using a template.  Using a template to apply a large decal allows for better precision and less decal wastage. 

In this instance I used a porcelain teapot, to which I had previously applied and fired a pattern to one half of the pot.  I then showed students how to make a template whilst navigating unusual curves like those around the spout and handle.  I then traced the template onto the decal, carefully cut out my shape and applied it. 

The students looked on, passed around some fired examples I brought along and asked many questions.  What a great group of thoughtful and interesting ceramic artists.  We are so thankful to have been provided with this awesome teaching opportunity and we look forward to going back to Greenwich Pottery in the near future!

If you are interested in seeing what we showed the students at Greenwich House Pottery, check out this tutorial on our blog.  We've got some photos of the teapot we made during the demo at the bottom of this post. 

Are you interested in having Milestone Decal Art come to your studio to teach a demo?  We are committed to teaching ceramic, glass and enamel artists the art of using decals.  Let us know what you want to learn more about and if we are in your neck of the woods, we can try and find a way to come on over!

1 Comment

Decal Collage:  Using Patterns and Shapes

Comment

Decal Collage: Using Patterns and Shapes

Here we created two templates.  The first one was used to cut out the solid orange color shape which we then fired in the kiln.  The next template will be used to cut out the blue Medieval Line Pattern to our desired shape.

Here we created two templates.  The first one was used to cut out the solid orange color shape which we then fired in the kiln.  The next template will be used to cut out the blue Medieval Line Pattern to our desired shape.

Large-size pattern decals can add unique surface design for your ceramic, glass or enamel work.  We sell these sheets in our shop in a variety of motifs and colors.  The standard sheet size is 8.5in x 10.4in (21.8cm x 26.6cm).  This large-sized format allows ceramic and glass artists to cut and apply the decals in a variety of shapes.  Two cheers for Surface Design!!!

In this brief post we will describe how to use templates to optimize how you use large format decal sheets.  Templates not only allow you to map out your design with precision, but they also minimize wastage.   Here we go!


You will need:  lightweight & heavier stock paper, scissors, tape, pencil, sharpie, clean razor blade.

We like to start with a flexible paper, like the wax paper that comes with your decal.

We like to start with a flexible paper, like the wax paper that comes with your decal.

Step 1. Loosely cut lightweight paper to shape of your piece. Tape one end of the paper to the ceramic.

Step 2. wrap paper around/ apply paper to your object using the back of your fingernail if necessary to crease into folds and corners. Continue to tape the paper as you go to ensure a tight template fit.  You may need to flay your paper to accommodate complex curves like those around handles or teapot spouts, for example.

Use the side of a sharpened pencil to trace along the cutting edges.

Use the side of a sharpened pencil to trace along the cutting edges.

Step 3. Once your paper is securely taped, use the edge of a sharpened pencil to trace along any edges. Sketch your desired design on the template.  Remove paper and trim along lines.

Step 4.  Using a non-warping glue (e.g. glue stick or rubber cement) tape your lightweight paper to heavier paper stock.  Trace around lightweight template paper and cut.  You now have a tracing template.

Step 5. Tape your tracing template to the BACK of the decal, taking care to keep the pattern lined up straight.  Trace along the edge of the taped template using a thick tipped marker, NOT pencil (graphite can leave marks after firing).

Step 6.  Apply decal.

Heavy-weigh paper template is taped to the backside of the decal sheet to trace for precise cutting.

Heavy-weigh paper template is taped to the backside of the decal sheet to trace for precise cutting.

Step 7.  You may feel the need to trim your decal in spots.  Use a sharp and fresh straight edge razor blade to trim, being sure to slide the flat edge along to slice the decal away (avoid using the pointed edge which will fold and tear the decal instead of cleanly slicing.)

Step 8. Carefully dry your piece and allow to dry overnight before firing.

Voila!  Porcelain mug with Medieval Line Pattern and Solid Orange Decal after final firing.  We hope this tutorial gives you some interesting ideas! 

Voila!  Porcelain mug with Medieval Line Pattern and Solid Orange Decal after final firing.  We hope this tutorial gives you some interesting ideas! 

Comment

1 Comment

The *Definitive* Guide to Using Ceramic Decals, Glass Fusing Decals and Enamel Decals

Have you been wondering about using ceramic decals, glass fusing decals enamel decals in your kilnwork - BUT -  you're not sure how to use them?  Well you're not alone...

We see a lot of head scratching when we talk to people about using decals.  Most people sort of get it, but they kinda don't get it too.  And we get that.  So we developed this simple Step-By-Step guide to walk people through the process and we hope you find it helpful!

These are the simple tools you will need to decorate your decals.

So let's get started.  To apply your decals you will need the following tools:

- scissors
- a kitchen towel
- a clean bowl of clean warm water
- a squeegee or mudtool
- a soft lint-free cloth
- a ceramic/ glass/ enamel body
- a kiln

step 1.  prepare a clean work space (i'm talking to you here ceramic artists.  please, whatever you do, don't use a dirty slip bowl for this).  lay a fresh tea towel flat on a table with the scissors, fresh water, a squeegee and cloth.  wash your ceramic/ glass/ enamel body in warm water.


Remove the wax paper from the decal.

step 2.  remove the wax paper from your decal if present and carefully cut around your decal.        

 TIP: put your unused decals to the side to ensure they don't get wet and therefore ruined.


Wet decal in clean, warm water for at least 30 seconds OR until it slides off backing paper easily.


step 3.  place your selected decal in the warm water and wait at least 30 seconds.  remove the decal and let is sit until it slides easily from the backing paper with little pressure.  Tip: avoid letting the decal sit too long in the water as you do not want it to float off the backing paper.

step 4.  slide the decal off the backing paper onto your ceramic/ glass/ enamel body.  do not flip the decal over.  the decal should remain face-up.  Tip: if you are not sure if your decal is face up, check back on the original item you purchased to see if your decal is reversed or not.

Use a squeegee or Mudtool to push the air and water out from under the decal.  Start from the center and push gently out towards the edges.

step 5.  carefully hold your decal in place while you use your squeegee to push out any water or air bubbles trapped under the decal.  start from the center of the decal and push out toward the edge, rotating your ceramic/ glass/ enamel as you carefully remove all; air and water from under the decal.

Carefully dry your decal and fire as per instructions.  This design available in our Stock Decal Shop.


step 6.  carefully dry your decorated lint-free cloth (e.g. old pillowcase) working from the center of the decal, gently pushing towards the edge of the decal.  allow decal to dry overnight and fire as per Milestone Decal Art firing instructions.


That's all folks!  It's pretty easy.  The two places where see the most errors are with A. not flipping the decal or with B. not getting all the water or air out from between the decal and the ware.  So take your time, listen to some music and apply your decals.  Once you do it a few times, it is really very easy!

1 Comment