
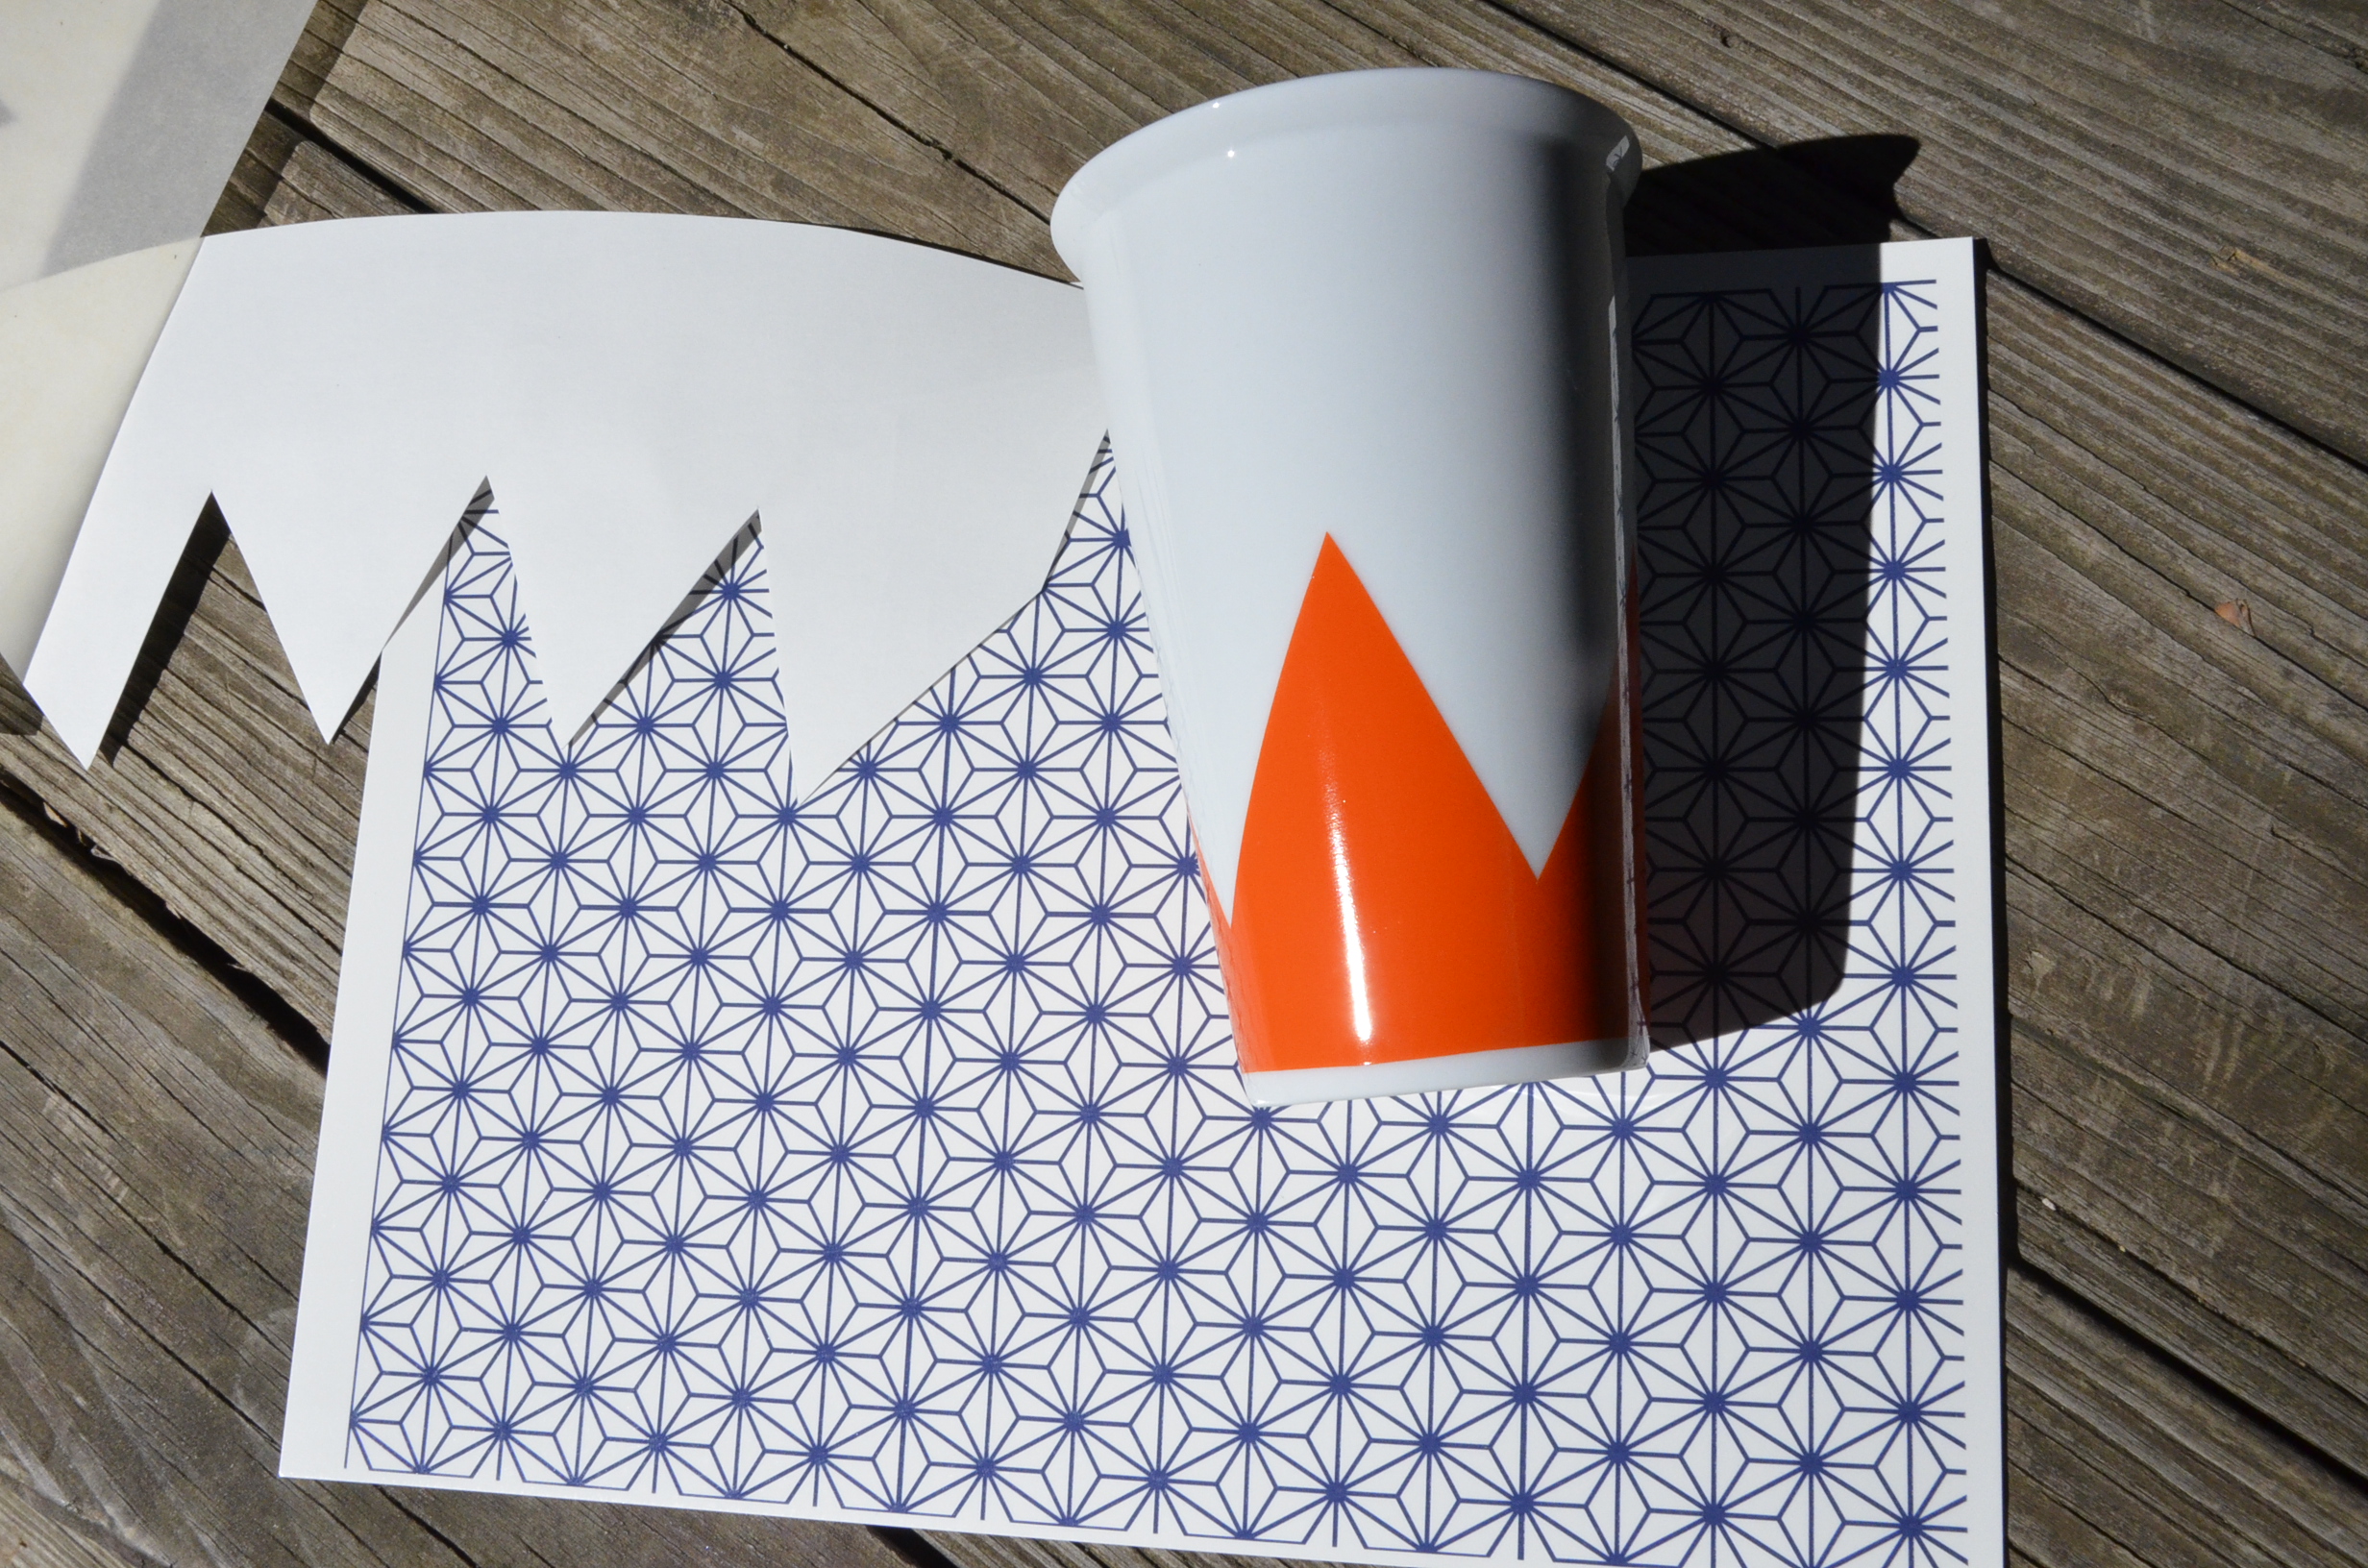
Here we created two templates. The first one was used to cut out the solid orange color shape which we then fired in the kiln. The next template will be used to cut out the blue Medieval Line Pattern to our desired shape.
Large-size pattern decals can add unique surface design for your ceramic, glass or enamel work. We sell these sheets in our shop in a variety of motifs and colors. The standard sheet size is 8.5in x 10.4in (21.8cm x 26.6cm). This large-sized format allows ceramic and glass artists to cut and apply the decals in a variety of shapes. Two cheers for Surface Design!!!
In this brief post we will describe how to use templates to optimize how you use large format decal sheets. Templates not only allow you to map out your design with precision, but they also minimize wastage. Here we go!
You will need: lightweight & heavier stock paper, scissors, tape, pencil, sharpie, clean razor blade.

We like to start with a flexible paper, like the wax paper that comes with your decal.
Step 1. Loosely cut lightweight paper to shape of your piece. Tape one end of the paper to the ceramic.
Step 2. wrap paper around/ apply paper to your object using the back of your fingernail if necessary to crease into folds and corners. Continue to tape the paper as you go to ensure a tight template fit. You may need to flay your paper to accommodate complex curves like those around handles or teapot spouts, for example.

Use the side of a sharpened pencil to trace along the cutting edges.
Step 3. Once your paper is securely taped, use the edge of a sharpened pencil to trace along any edges. Sketch your desired design on the template. Remove paper and trim along lines.
Step 4. Using a non-warping glue (e.g. glue stick or rubber cement) tape your lightweight paper to heavier paper stock. Trace around lightweight template paper and cut. You now have a tracing template.
Step 5. Tape your tracing template to the BACK of the decal, taking care to keep the pattern lined up straight. Trace along the edge of the taped template using a thick tipped marker, NOT pencil (graphite can leave marks after firing).
Step 6. Apply decal.

Heavy-weigh paper template is taped to the backside of the decal sheet to trace for precise cutting.
Step 7. You may feel the need to trim your decal in spots. Use a sharp and fresh straight edge razor blade to trim, being sure to slide the flat edge along to slice the decal away (avoid using the pointed edge which will fold and tear the decal instead of cleanly slicing.)
Step 8. Carefully dry your piece and allow to dry overnight before firing.

Voila! Porcelain mug with Medieval Line Pattern and Solid Orange Decal after final firing. We hope this tutorial gives you some interesting ideas!